

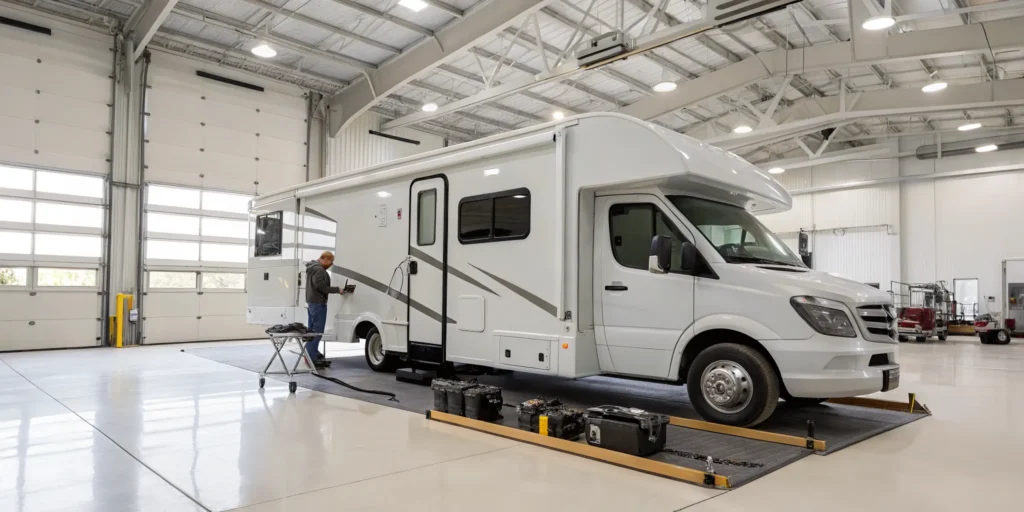
It’s a moment every RVer dreads. You arrive at your destination, ready to relax, but when you press the button for your slide-out, you’re met with silence, or worse, a terrible grinding sound. A stuck slide can bring your trip to a screeching halt, but it doesn’t have to be a catastrophe. Many slide-out failures are caused by common, often simple, issues. This guide is your first step in effective rv slide out troubleshooting. We’ll walk you through the most frequent culprits, from basic power problems to hidden physical blockages. You’ll learn how to diagnose the issue and decide whether it’s a quick fix you can handle yourself or if it’s time to call in the experts for a professional repair.
Key Takeaways
- Troubleshoot the basics first: When a slide-out gets stuck, don’t panic. Check for simple fixes like a low battery, a blown fuse, or something physically blocking the slide’s path inside or out. These quick checks often solve the problem.
- Prevention is your best tool: Consistent care is the key to a reliable slide-out. Make it a habit to clean and lubricate the tracks, inspect the seals for wear, and only operate the slide when your RV is level to prevent strain and damage.
- Know when to call for backup: Some issues require an expert. If you hear grinding sounds, see that the slide is crooked, or suspect a complex electrical fault, it’s time to stop. Forcing the mechanism can lead to more expensive repairs.
What Are the Most Common RV Slide-Out Problems?
Slide-outs are one of the best features of a modern RV, transforming a compact space into a roomy living area with the push of a button. But when that button doesn’t work, it can bring your travel plans to a screeching halt. Understanding what might be going wrong is the first step to getting things moving again. Most slide-out issues fall into a few common categories, from simple power problems to more complex mechanical failures.
Before you panic, know that many of these problems have straightforward solutions. Often, the fix is something you can handle yourself with a little troubleshooting. We’ll walk through the most frequent culprits, including electrical glitches, motor trouble, physical blockages, and seal damage. By learning to spot these issues, you’ll be better prepared to diagnose the problem and decide whether it’s a quick fix or time to call in the experts.
Power Loss and Electrical Faults
More often than not, a stubborn slide-out is simply not getting the power it needs. These motors are power-hungry, and a low battery is a common reason for failure. Before you assume the worst, check that your RV is plugged into shore power or that your house batteries are fully charged. A weak connection can also be the problem, so take a moment to ensure your battery terminals are clean and tight. Sometimes, the solution is as simple as starting your generator to give the system the juice it requires. A reliable power system is key to a smooth trip, so keeping an eye on your batteries is always a good practice for more than just your RV’s solar and off-grid capabilities.
Mechanical Motor Failure
If you’re confident your RV has plenty of power but the slide-out still won’t budge, you might be dealing with a motor issue. A failing motor often gives warning signs. You might hear grinding, clicking, or straining sounds when you press the switch, or you might hear nothing at all. If the motor is completely silent, it could mean it has burned out or has a faulty connection. While you can check the wiring for obvious damage, motor replacement is usually a job for a professional. If your slide-out system is consistently giving you trouble, it might be time to consider an upgrade to a more reliable mechanism like a Vroom Slide System.
Physical Obstructions and Debris
Sometimes the problem isn’t mechanical or electrical at all, but physical. It’s easy for something to get in the way of the slide-out’s path. Inside, an item may have shifted during travel, like a stray shoe, a bin, or a piece of furniture that’s just slightly out of place. Outside, debris like rocks, twigs, or accumulated dirt can jam the tracks and stop the slide-out cold. Before you try to force it, do a thorough visual inspection of the slide-out’s path, both inside and out. Keeping your RV’s exterior clean is a great preventative measure, and a good wash and detail can help you spot potential issues before they become problems.
Damaged Seals and Water Leaks
The rubber seals around your slide-out are your first line of defense against the elements. Over time, they can dry out, crack, and tear. While a damaged seal might not stop your slide from moving, it creates a much bigger problem: water intrusion. Even a small gap can let rain in, leading to devastating water damage, rot, and mold inside your RV’s walls and floors. You should inspect your seals regularly as part of your routine maintenance. If you notice any brittleness, gaps, or tears, it’s critical to get them replaced to prevent costly damage. Protecting your rig from leaks is just as important as any other RV service and repair.
What to Check First When Your Slide-Out Is Stuck
When your slide-out refuses to budge, it’s easy to imagine the worst-case scenario. But before you panic, take a deep breath. Often, the problem is something simple you can identify and fix yourself in just a few minutes. Running through a quick diagnostic checklist can save you a lot of stress and potentially a trip to the repair shop. These are the first four things you should always check when your slide-out gets stuck. It’s all about starting with the most common and easiest-to-fix issues before moving on to more complex possibilities.
Check Your Battery Power and Connections
Your slide-out motor is a power-hungry component, and it won’t work without a steady supply of electricity. A weak or dead battery is one of the most frequent reasons a slide-out gets stuck. Start by making sure your RV’s batteries are fully charged. If you have access to shore power, plug your rig in to ensure you have enough juice. While you’re at it, take a look at the battery terminals. They should be clean, free of corrosion, and tightly connected. A loose connection can prevent power from reaching the motor, even if the battery itself is fine. These basic electrical checks are a crucial part of routine RV services and repairs.
Inspect the Fuses and Circuit Breakers
If your battery is good but the slide-out is completely unresponsive (no noise, no movement), the next logical step is to check your fuses and breakers. A blown fuse or a tripped breaker acts like a safety switch, cutting off the electrical circuit to prevent damage. Find your RV’s main fuse panel and look for any fuses labeled for the slide-out. If you find a blown one, replace it with a new fuse of the same amperage. Also, check for any tripped circuit breakers and reset them. Some slide-out systems have an additional inline fuse located near the battery, so be sure to check there as well if you don’t find the issue in the main panel.
Test the Slide-Out Switch
Sometimes the problem lies with the button you’re pressing. The slide-out switch itself can wear out or develop a loose connection over time. If you press the switch and hear nothing, or if it only works sporadically, the switch might be the culprit. Try pressing it firmly and holding it for a few seconds. If you feel comfortable doing so, you can also check for any loose wires behind the switch plate. A faulty switch is usually a straightforward and inexpensive part to replace. If you’ve checked the power and fuses, and the switch seems to be the issue, it’s a relatively simple fix that can get you back on track quickly.
Look for Anything Blocking the Way
It might sound obvious, but you’d be surprised how often a simple physical obstruction is the problem. Before you try to extend or retract the slide, always do a quick visual sweep. Inside, make sure no furniture has shifted, a cabinet door isn’t ajar, or a stray item hasn’t fallen in the slide’s path. Outside, inspect the tracks and gears for rocks, sticks, dirt, or other debris. Even a small object can jam the mechanism. This is also why having quality slide toppers is so important; they help prevent debris from getting on top of your slide and causing issues. A good TrueTopper Slide Top can save you a lot of headaches by keeping the area clean.
How to Fix Electrical Slide-Out Problems
If you’ve ruled out a dead battery and physical obstructions, it’s time to look at the electrical system itself. Electrical issues are a common cause of slide-out failures, but many are simple enough to diagnose on your own. Before you start, always disconnect your RV from shore power and turn off your main battery disconnect switch to be safe. From there, you can work through these common electrical culprits one by one.
Test the Voltage at the Motor
Your slide-out motor needs a lot of consistent power to work. Even if your lights turn on, your battery might not have enough juice to move the slide. Make sure your RV batteries are fully charged or you’re plugged into shore power. If the slide still won’t budge, the next step is to see if power is even reaching the motor. Using a multimeter, you can test the voltage at the two leads on the slide-out motor. If you’re getting a proper reading (typically 12 volts or more) when someone presses the switch, but the motor isn’t running, the motor itself has likely failed. If you get no reading, the problem lies somewhere else in the wiring or switches.
Inspect the Wiring for Damage
The wiring for your slide-out is often routed through tight spaces and can get pinched, frayed, or disconnected from the constant movement and vibration of travel. Start with a visual inspection. Look for any obvious signs of damage along the wires running from the battery to the switch and from the switch to the motor. Pay close attention to the connections behind the slide-out switch itself, as these can sometimes work themselves loose. If a wire looks damaged, it could be causing a short or preventing power from getting through. While simple reconnections are straightforward, complex wiring issues are best left to the pros who handle RV services and repairs.
Replace Blown Fuses or Reset Breakers
If the slide-out is completely unresponsive and makes no sound, a blown fuse or tripped breaker is a likely suspect. Locate your RV’s main fuse panel and look for the fuse labeled for the slide-out. Visually inspect it; if the small metal strip inside is broken, the fuse is blown. Replace it with a new fuse of the exact same amperage. If you have circuit breakers instead, find the one for the slide and flip it completely off and then back on to reset it. If a new fuse blows immediately or the breaker trips again, don’t keep trying. This indicates a more serious electrical short that needs professional diagnosis to prevent further damage.
Check the Control Panel Connections
Beyond the simple wall switch, many RVs have a central control module that operates the slide-out system. This is the brain of the operation. Check your owner’s manual to find its location, which is often in a storage bay or under a cabinet. Once you find it, check that all the wiring harnesses are securely plugged in. Sometimes a bumpy road is all it takes to loosen a connection. While you’re there, listen carefully as someone tries to operate the slide. If you can hear the motor running but the slide isn’t moving, you may have a different problem, like a broken shear pin. These pins are designed to break to prevent motor damage, and replacing them can get your slide moving again.
How to Find and Clear Slide-Out Obstructions
When your slide-out refuses to budge, it’s easy to assume the worst, like a major mechanical failure. But before you panic, take a deep breath. More often than not, the culprit is something simple: a physical obstruction. Something is just plain in the way. The best way to figure this out is to play detective and do a thorough inspection of the slide-out’s path, both inside and outside your RV. A systematic check can save you a lot of stress and potentially a trip to the repair shop.
Start by turning off the power to the slide-out to be safe. Then, grab a flashlight and get ready to look in, under, and around the entire mechanism. We’ll walk through the most common places where blockages hide. If you check all these spots and still can’t find the problem, or if you discover damage to the slide mechanism itself, it might be time to call in the pros for RV services and repairs.
Look for Shifted Items Inside Your RV
Your RV is a tiny home on wheels, and things can shift around during travel. Before you even think about pressing that slide-out button, do a quick scan inside. Sometimes, an item as small as a fallen shoe, a stray dog toy, or a bin that slid out of place can jam the mechanism. Check along the floor where the slide moves and make sure no furniture, rugs, or cabinet doors are in its path. It’s a great habit to troubleshoot these issues by making a quick interior check part of your standard setup and breakdown routine.
Clear Debris from the Exterior Tracks
The outside of your slide-out is constantly exposed to the elements, making it a prime spot for debris to collect. Take a walk around your RV and carefully inspect the slide-out’s roof, seals, and tracks. You’re looking for anything that doesn’t belong, like twigs, leaves, pinecones, or small rocks that can get caught in the gears and stop the slide cold. A small brush or a can of compressed air can work wonders for cleaning out the tracks. Regular RV washing and detailing helps keep these areas clean and can prevent buildup over time.
Ensure Awnings and Gear Are Clear
It’s not just debris you need to worry about. Other parts of your RV and your campsite setup can also get in the way. Before operating your slide, double-check that any slide-out awnings are functioning correctly and not snagged. Also, take a look at the area around your RV. Is a camp chair, a cooler, or a grill sitting too close to the wall? Make sure you have a clear zone around the entire slide-out before you try to extend or retract it. This simple step prevents accidental damage to both your slide-out and your gear.
Check for Weather-Related Blockages
Weather can be your slide-out’s sneaky enemy. A heavy rainstorm can wash leaves and mud into the tracks, while strong winds can deposit branches on top of the slide. In colder weather, ice and snow can build up, freezing the mechanism in place. After any significant weather event, it’s wise to do a thorough inspection before operating your slide. If you’re camping in freezing temperatures, be especially vigilant for ice. Properly preparing your rig with a winter readiness service can help you avoid many of these cold-weather headaches.
How to Manually Override a Stuck Slide-Out
When your slide-out won’t budge and you’ve already checked the power and cleared any obstructions, it’s time to consider the manual override. This is your backup plan, designed to get your slide-out retracted so you can safely get back on the road and head to a service center. It’s not a permanent fix, but it’s an essential skill for any RVer to know in a pinch.
The process can feel a little intimidating, but it’s manageable with the right instructions and a bit of patience. Before you start, take a deep breath. The goal here is to safely bring the room in without causing more damage. The exact method will depend on whether your slide-out operates on an electric or hydraulic system. Your owner’s manual is your best friend here, as it will have the specific details for your RV model. If you can’t find your manual, you can often find a digital copy online by searching for your RV’s make, model, and year. Let’s walk through the general steps for finding and using your override system.
Find Your Manual Override System
First things first, you need to locate the manual override mechanism. Most RVs have one, but its location can vary. Your owner’s manual will show you exactly where to look. Generally, you’re searching for an access point that allows you to use a hand crank or a wrench to move the slide-out gears manually.
For electric slide-outs, you might find an access hole on the side of your RV opposite the slide-out. Look along the frame rail for a small cutout or a labeled port. For hydraulic systems, you’ll typically need to access the hydraulic pump itself, which might be in a front or side storage compartment. The override on these systems often involves using a T-handle or a hex bit in a power drill to operate the pump manually. Take a moment to find the correct tool, which should have come with your RV.
Follow the Steps for Manual Override
Once you’ve found the override system and have the right tool, you can begin the process. Remember, the steps differ for electric and hydraulic systems. For an electric slide-out, you may need to disengage the motor first. This often involves removing a single screw on the exterior motor and lifting it out of its housing. With the motor disengaged, you and a partner can start pushing the room in evenly from both sides.
For a hydraulic slide-out, you’ll typically open the valves on the hydraulic pump. This releases the pressure holding the slide in place. You can then use a T-handle or a drill with a hex bit to manually pump the fluid, or in some cases, you may need to push the slide in by hand. If you’re tired of dealing with a faulty mechanism, you might consider upgrading to more reliable Vroom Slide Systems for a long-term solution.
Key Safety Precautions to Take
Safety should always be your top priority. The most important rule is to never force a slide-out that doesn’t want to move. Applying too much pressure can bend tracks, break gears, or damage the motor, leading to a much more expensive repair. If you feel significant resistance, stop and reassess the situation.
Also, be aware that attempting complex repairs on your own can sometimes void your warranty. If your RV is still under warranty, it might be best to call for roadside assistance. If you see that the slide-out is crooked, visibly off its tracks, or if you hear grinding noises, it’s a clear sign to stop what you’re doing. These are symptoms of a bigger problem that requires professional attention. The manual override is for emergencies only, not a substitute for proper RV services and repairs.
When Is It Time to Call a Professional?
While it’s empowering to handle some RV maintenance yourself, there are times when it’s smarter and safer to call in a professional. Slide-out systems are heavy and complex, and a small mistake can lead to a much bigger, more expensive problem. If you’ve tried the basic troubleshooting steps and are still stuck, or if the issue seems beyond a simple fix, it’s time to put down the tools and pick up the phone. Pushing a system that’s already struggling can cause permanent damage to the motor, tracks, or even the structure of your RV wall.
Recognizing the signs of a serious problem is key. Issues like a grinding motor, complex electrical faults, or a visibly crooked slide-out are red flags that point to something more than a blown fuse or a simple obstruction. In these cases, an expert technician can diagnose the root cause quickly and safely. They have the specialized tools and experience to handle these intricate systems without causing further damage. For persistent or major slide-out failures, upgrading to a more reliable mechanism like the Vroom Slide System can be a long-term solution that prevents future headaches. Sometimes, the best DIY move is knowing your limits and calling for backup.
The Motor Is Grinding or Completely Silent
That awful grinding sound is your slide-out motor crying for help. It often means gears are stripped, teeth are broken, or there’s a severe mechanical bind within the system. Continuing to run the motor will only cause more destruction. On the other hand, complete silence when you hit the switch can be just as alarming. If you’ve already confirmed you have power and the fuse is good, a silent motor likely means it has failed internally. These aren’t simple fixes; they point to a need for motor replacement or a significant mechanical repair. Forcing it is off the table, so it’s the perfect time to let a professional take over.
You’ve Pinpointed a Complex Electrical Issue
If you’ve moved beyond checking the battery and fuse box and are now staring at a confusing tangle of wires, it’s a good moment to pause. While simple electrical fixes are one thing, diagnosing shorts, testing voltage across multiple points, or tracing a faulty connection through your RV’s walls requires expertise. One wrong move can damage sensitive control boards or, worse, create a fire hazard. If you suspect the problem is electrical but can’t easily solve it, calling for professional RV services and repairs is your safest bet. A technician can safely diagnose the fault and ensure the repair is done right, protecting you and your rig.
The Slide-Out Is Visibly Misaligned or Damaged
When you look at your slide-out, does it appear crooked, tilted, or like one side is extending more than the other? This is a major red flag. A misaligned slide indicates a problem with the timing, tracks, or support structure. It’s not just an aesthetic issue; operating a crooked slide can damage your RV’s seals, floors, and even the wall frame itself. This can quickly lead to water leaks and structural damage. Don’t try to force it back into place. This situation requires precise adjustments and a thorough inspection to find the underlying cause, making it a clear job for an experienced technician.
You Have Safety or Warranty Concerns
Your personal safety should always come first. Slide-outs are incredibly heavy, and trying to fix a major mechanical issue without the right equipment and knowledge can be dangerous. Beyond the physical risk, if your RV is still under warranty, an unauthorized DIY repair attempt could void it completely. This would leave you responsible for the full cost of what might have been a covered repair. When you’re dealing with a complex problem, calling a professional isn’t giving up; it’s the smartest, safest, and often most financially sound decision you can make to protect your investment.
How to Prevent Future Slide-Out Problems
After dealing with a stuck slide-out, the last thing you want is a repeat performance. The good news is that most slide-out issues are preventable with a little routine care. Think of it as building good habits that protect your investment and keep your adventures running smoothly. A slide-out that works every time is a key part of enjoying the space and comfort of your RV, so keeping it in top shape is just as important as any other maintenance task. By paying attention to a few key areas, you can significantly reduce the chances of getting stuck with a slide-out that won’t budge. These preventative steps don’t require a lot of time, but they make a huge difference in the long-term health and reliability of your system. Here are the four most important habits to adopt for a happy, healthy slide-out system.
Keep the Mechanisms Clean and Lubricated
Your slide-out’s tracks, gears, and seals are constantly exposed to the elements. Dirt, leaves, and road grime can build up, causing friction and putting extra strain on the motor. Make it a habit to regularly wipe down the tracks and clear away any visible debris. After cleaning, apply a lubricant specifically designed for RV slide-outs to keep everything moving smoothly. This simple step reduces wear and tear on the moving parts and helps the motor operate with less effort. If you want a deep clean, a professional RV washing and detailing service can ensure even the hard-to-reach spots are spotless and properly prepped for lubrication.
Follow a Seasonal Inspection Checklist
Just like you visit the doctor for a check-up, your RV benefits from a yearly professional inspection. A trained technician can spot developing issues you might miss, like worn-out seals, frayed wiring, or a motor that’s showing signs of strain. We recommend having a professional look over the entire slide-out system at least once a year. This is a great task to add to your spring prep or winter readiness service checklist. A thorough inspection is one of the best ways to catch small problems before they turn into trip-ending emergencies, giving you peace of mind before you hit the road for the season.
Be Mindful of Weight Distribution
It’s easy to forget that your slide-out is a moving part of your RV, not a reinforced storage bay. Overloading it with heavy items can put immense stress on the motors and tracks, leading to misalignment and mechanical failure. Be conscious of where you store heavy gear. Try to distribute weight evenly throughout your RV instead of concentrating it all in the slide-out area. Think about heavy items like cases of water, canned goods, or toolboxes, and find them a home over the main chassis when possible. This simple practice doesn’t cost a thing, but it can save you from a costly repair by extending the life of your slide-out mechanism.
Operate Your Slide-Outs Correctly
How you operate your slide-out matters. Always follow these two golden rules. First, make sure your RV is completely level before extending or retracting the slides. Operating them on an angle can cause the mechanism to twist and bind, which can lead to serious damage. Second, always extend or retract the slide-out in one continuous motion. Don’t stop and start partway through, as this can throw off the system’s synchronization. If your current system feels clunky or unreliable, you might consider an upgrade to something more robust like the Vroom Slide Systems for a smoother, more dependable operation.
Related Articles
- Vroom Slide System Installers | Patriots RV Services
- Expert RV Service – Denton, TX | Patriots RV Services
- Services – Patriots RV Services
Frequently Asked Questions
What’s the very first thing I should do if my slide-out is stuck? Before you assume the worst, check your power source. A slide-out motor requires a lot of energy, so a low battery is a very common culprit. Make sure your RV is connected to shore power or that your house batteries are fully charged. If your power is good, the next step is to do a quick visual sweep inside and outside for anything that might be physically blocking the slide’s path.
Is it okay to stop my slide-out halfway when extending or retracting it? You should always try to operate your slide-out in one continuous motion. Stopping and starting partway through the cycle can throw the motors out of sync with each other. Over time, this can cause the slide-out to become misaligned or crooked, which puts a lot of stress on the entire system and can lead to more serious problems down the road.
How often should I clean and lubricate my slide-out? A great habit is to inspect and clean the tracks and seals every few months, especially if you use your RV often. As for lubrication, applying a product made specifically for RV slides two or three times a year is a good baseline. If you’re camping in a dusty or sandy environment, you may want to clean the mechanisms more frequently to prevent buildup.
My slide-out is making a grinding noise. What does that mean? A grinding or clicking sound is a clear signal to stop what you’re doing. This noise usually indicates a mechanical problem, such as stripped gears or an issue with the track alignment. Continuing to operate the slide will likely cause more damage. This is a definite sign that it’s time to have a professional technician diagnose the problem.
Can I just push my slide-out in by hand if it gets stuck? While most RVs have a manual override, it’s not as simple as just pushing the room in. You must follow a specific procedure, which usually involves disengaging the motor or releasing hydraulic pressure first. Forcing a slide-out without following the steps in your owner’s manual can cause severe damage to the tracks and gears. The override is an emergency tool to get you safely to a repair shop, not a regular fix.
Need Professional RV Service in Denton, TX?
Call (940) 488-5047 — Patriots RV Services, your mission-critical RV service center in Denton, TX.