

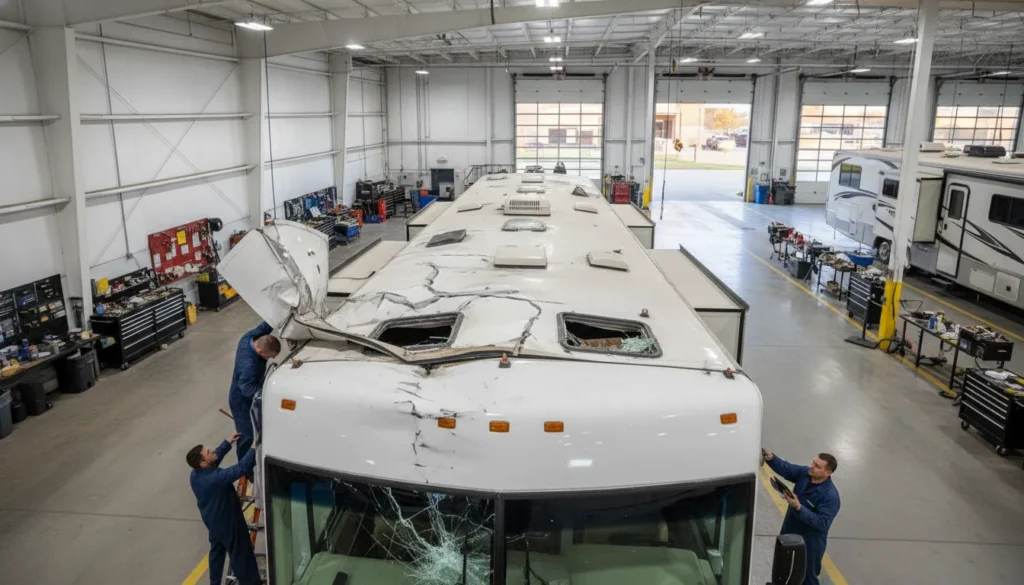
Hail dents may look cosmetic, but one missed roof puncture can turn into major water damage. A strong claim records every impact before repairs hide the evidence.
RV insurance claim repair works best when you document damage first, file quickly, and let a qualified RV facility inspect the entire coach. Before moving or cleaning the RV, photograph every side, the roof, vents, windows, interior, debris, and the wider scene from several angles. The Texas Department of Insurance advises owners to take photos and video, list all damage, prevent further loss, and save every related receipt. Next, obtain a detailed estimate that separates collision, body, roof, structural, mechanical, and water-intrusion work, then send it to your adjuster for review. Begin permanent repairs only after the insurer and repair facility agree on the documented scope, while keeping records of approvals, supplements, invoices, and communication.
The central question is not simply whether insurance may pay; it is how to build a claim that supports every necessary specialized repair. RV insurance claim repair starts with the right documentation, because adjusters and technicians can only act on damage they can clearly see and verify. Here’s how.
RV insurance claim repair starts with the right documentation
Good documentation gives your insurer and repair shop a clear record of what happened. Start as soon as everyone is safe, before cleanup or temporary work changes the visible damage. For help planning the next step near Denton, call Patriots RV Services at (940) 290-7800 to arrange an inspection.
Photos that show the full damage
Take wide photos of every damaged side, then move closer for clear detail shots. Capture hail dents, cracked panels, scraped paint, broken lights, damaged trim, and any impact point. Photograph the surrounding scene when it helps explain how the loss happened.
For roof damage, photograph vents, covers, seams, and visible tears only from a safe position. Do not climb onto an unsafe or damaged roof. The Texas Department of Insurance advises owners to take photos and video of damage and make a list of affected areas.
- Take one full-view photo of each side, the front, the rear, and the roof when safe.
- Add close photos from several angles so dents, cracks, and gaps are easy to see.
- Photograph the VIN, license plate, odometer, and any damaged personal items.
- Save original image files, since their dates can help support the incident timeline.
Incident notes and claim records
Write down the date, time, location, weather, and a plain account of the incident. For a collision, record the other driver’s contact and insurance details. Also save the police report number, witness details, and towing records when they apply.
Create one folder for your policy, claim number, adjuster’s contact details, photos, emails, and receipts. Keep notes from each call, including the date, person’s name, and next action. This simple file helps everyone follow the same RV insurance claim repair timeline.
If rain can enter through a broken window or opening, take photos before making a temporary cover. Save receipts and ask the insurer what emergency work it permits. Avoid permanent repairs until the damage has been inspected and the repair scope is clear.
Why a prompt RV inspection matters
Visible damage may not show the full repair need. A dented exterior can sit near trim, seals, lights, or other parts that need a closer check. Patriots’ RV paint and body collision repair team can document affected areas and build a detailed repair plan.
Storm damage also calls for a careful roof check, since small tears or damaged seals may be easy to miss from the ground. The RV roof repair team can inspect the roof and explain the findings. Owners in Denton and North Texas should not delay an inspection while waiting for damage to become more obvious.
Bring your photos, incident notes, policy details, and claim number to the appointment. Tell the shop about any new leaks, warning lights, unusual sounds, or changes in how the RV drives. A complete starting record helps the shop prepare an estimate that matches the damage found.
What does insurance usually review on an RV damage claim?
An adjuster usually reviews whether the reported event caused damage covered by the policy. The review also checks the loss date, claim details, deductible, and any policy limits or exclusions. Coverage differs by carrier and policy. Owners should confirm their terms directly with the insurer.
Cause, coverage, and prior condition
The cause of loss helps the insurer decide which policy terms apply. A sudden collision, hailstorm, or falling object may be reviewed differently from wear, leaks, or damage that developed over time. Clear notes about when and how the damage appeared can help establish the timeline.
Adjusters may also look for pre-existing damage or signs of missed maintenance. They often compare the claimed damage with the RV’s age, condition, service records, and earlier photos. This review helps separate new damage from older issues that may not be part of the claim.
Photos, inspection, and estimate
Photos and video show the damage before repairs change the scene. Capture wide views, close details, damaged parts, and nearby areas that appear unaffected. The Texas Department of Insurance recommends documenting damage with photos and video and making a list of damaged items.
A repair facility can then inspect areas that exterior photos may not reveal. Its estimate should describe the damage, repair method, parts, labor, materials, and related work. A detailed insurance claim repair estimate gives the adjuster a clear scope to review.
Repair scope and approval
The adjuster compares the shop’s scope with the policy and the insurer’s own assessment. Questions may focus on repair versus replacement, part type, labor hours, labor rates, paint work, or hidden damage. The deductible and coverage limits can also affect the amount approved.
Some damage becomes clear only after technicians remove panels or inspect connected RV systems. The shop may then document the added findings and send a revised estimate for review. Owners should ask whether approval is needed before extra work begins.
Good records keep the RV insurance claim repair review focused on visible facts and a clear repair plan. Patriots RV Services uses detailed inspections to plan RV paint and body collision repair in Krum, near Denton, TX. The carrier, not the repair shop, makes coverage and payment decisions under the policy.
Why hidden RV damage inspections matter before repairs begin
A dented panel may be the clearest sign of a collision or hailstorm, but it may not show the full repair scope. An RV combines a roof, sealed openings, body panels, frame parts, and living systems in one structure. Damage in one area can affect another area that looks normal from outside.
Damage beyond the visible impact
A careful inspection starts at the impact area, then follows the likely path of force or water. On the roof, technicians check the membrane, seams, vents, covers, and sealed edges. Small punctures, loose sealant, or cracked vent parts may let water enter after the storm has passed.
Sidewalls and body panels also need more than a quick look. A panel may hide damaged supports, broken fasteners, or a gap where water can enter. The inspection should also check nearby doors, windows, trim, and paint for changes in fit or finish. Our guide to water damage insurance claims explains why finding the entry point matters.
Systems that need testing
Collision force can travel beyond the first point of contact. Technicians may need to check frame-related areas, suspension points, slide operation, wiring, plumbing, appliances, and other nearby systems. The goal is to find damage that a surface repair would leave behind.
- Roof membrane, seams, vents, covers, and sealant.
- Sidewalls, paint, body panels, trim, doors, and windows.
- Frame-related areas, supports, fasteners, and alignment.
- Interior stains, soft areas, damp materials, and water paths.
- Electrical, plumbing, slide, appliance, and climate systems.
Before cleanup or temporary protection changes the scene, record what you can safely see. The Texas Department of Insurance advises owners to take photos and video of damage inside and outside. It also advises preventing more damage and saving related receipts. A repair center can add detailed findings and test results to that first record.
Why RV repair knowledge changes the estimate
A generic body shop may be skilled at straightening and painting vehicle panels. An RV service center must also account for roof materials, sealed joints, interior finishes, and connected living systems. That wider view helps build an RV insurance claim repair scope around the whole loss, not only the visible dent.
The inspection findings should connect each damaged area with a repair method, labor need, part, photo, or test result. This detail gives the owner and insurer a clearer basis for reviewing the estimate. It can also reduce the risk of discovering missed work after repairs have started. Learn what belongs in accurate insurance claim repair estimates before approving the repair plan.
How a detailed repair estimate supports your insurance claim
A clear record of visible damage
A detailed estimate gives the owner, insurer, and repair center one shared record of the damage. It should connect each repair line to the inspection findings and supporting photos. The Texas Department of Insurance advises owners to take photos and video of damage and make a list of affected areas.
Good photos show both the full damaged area and close views of cracks, dents, tears, or missing parts. Notes should state where each problem appears and how it affects the RV. This record helps an adjuster review the scope without relying on a short description alone.
The estimate should separate roof, body, paint, and collision work when several areas need repair. That separation makes the RV insurance claim repair easier to review. It also helps prevent a damaged roof vent, panel seam, or trim piece from getting lost within a broad line item.
Line items that explain the repair plan
Each line item should name the damaged part, planned repair, needed materials, and labor category. Labor may include inspection, removal, body work, paint preparation, refinishing, installation, or final testing. Clear categories show what the repair center must do, not just the final price.
Parts availability also belongs in the estimate review. Some RV parts may need model details, finish matching, or confirmation from a supplier before work starts. The estimate can note known lead-time concerns without promising a firm arrival date. Owners can use Patriots’ guide to insurance claim repair estimates when reviewing this level of detail.
- Check that every damaged area appears in the written scope.
- Confirm that photos match the listed roof, body, paint, and collision work.
- Ask which parts are confirmed and which still need availability checks.
- Review labor categories so each stage of work is clear.
Price matters, but detail helps owners compare repair plans on equal terms. The Texas Department of Insurance also recommends getting more than one repair estimate. A low total may leave out work that another estimate explains clearly.
Supplements and communication after work begins
An initial inspection cannot always reveal damage behind panels, trim, roof layers, or interior finishes. If technicians find hidden damage during disassembly, they may prepare a supplement. This document adds photos, findings, labor, and parts that were not visible during the first inspection.
A supplement does not replace the first estimate. It updates the repair scope so the owner and insurer can review new findings before related work moves forward. Clear records help explain why the plan or cost changed.
Communication should stay direct throughout the claim. The repair center explains technical findings, the insurer reviews coverage and approvals, and the owner makes claim decisions. Regular updates about approvals, parts, supplements, and scheduling reduce confusion and keep everyone working from the same repair plan.
Before repairs start, ask who will send documents to the insurer and who will answer follow-up questions. Also confirm how the center will report hidden damage. That process supports a cleaner claim review and gives the owner a reliable record from inspection through final repair.
The right repair sequence after approval
Approval starts the repair phase, but it does not mean every task should begin at once. A clear sequence keeps completed work from being damaged by later repairs.
It also helps the shop track the approved scope, parts, added damage, and quality checks. For an RV insurance claim repair, each stage should support the next one.
From intake to an approved repair plan
Once approval arrives, the repair facility should confirm the claim scope before removing parts or starting major work. The team can then compare the insurer’s approval with the shop’s detailed inspection.
That comparison may uncover hidden damage that was not visible during the first review. A clear insurance claim repair estimate gives the owner, shop, and insurer the same repair plan.
-
Complete intake and inspection. Record the RV’s condition, confirm the approved damage, and inspect nearby components for related problems.
-
Match the estimate to the approval. Compare repair lines, labor, materials, and parts before work begins. Send added findings for insurance review when needed.
-
Order and verify parts. Confirm fit, finish, and availability before dismantling areas that may need to stay protected.
-
Repair the structure and roof first. Correct framing, roof, seal, and water-entry problems before cosmetic work covers those areas.
-
Complete body and paint work. Repair exterior panels, prepare surfaces, match finishes, and protect nearby seals and trim.
-
Test systems and perform final review. Check affected electrical, plumbing, appliance, chassis, and safety systems. Then inspect finish quality and repair records.
The sequence can change when the inspection reveals added damage or a delayed part affects access. Those changes should be documented before the shop moves into work that could hide the problem.
Structural and roof work before cosmetics
Structural, roof, and leak repairs belong ahead of body finishing because they may require panel removal or access from several sides. Completing paint first can lead to avoidable removal, masking, or refinishing later.
Water protection also needs prompt attention throughout the repair. The Texas Department of Insurance advises owners to prevent more damage by covering openings and keeping rain out.
A shop may use temporary protection while approved roof or structural work is pending. Permanent repairs should address the damaged material, seals, and entry path before interior finishes are closed.
Owners dealing with roof-related damage can review the shop’s approach to RV roof repair. This helps explain why leak testing and seal checks must come before final cosmetic work.
Systems checks and final quality review
After major repairs, technicians should test systems connected to the damaged area. A collision or leak can affect wiring, plumbing, appliances, lights, slide components, or chassis parts beyond visible damage.
The final quality review should compare completed work with the approved plan and any approved additions. It should also confirm fit, finish, operation, leak protection, and repair documentation before delivery.
This order reduces rework and helps protect the RV from water intrusion during the repair. It also gives the owner a clear record of what was repaired and checked.
Why RV hail damage repair in Texas needs RV-specific expertise
After a North Texas hailstorm, visible dents may be only part of the damage. Hail can also harm roof membranes, vents, seals, sidewalls, paint, and molded body panels. Each surface needs the right inspection and repair method.
A specialist looks beyond appearance. The inspection should trace every impact point and check nearby seams for paths that may let water enter. Owners can learn more about the risks and next steps in this roof damage insurance claim repair guide.
Why RV construction changes the repair plan
An RV is not built like a passenger car. Its roof, walls, windows, trim, and mounted equipment form one connected weather barrier. A dent repair that ignores a cracked seal or punctured membrane can leave the coach open to leaks.
Material choices also vary across motorhomes, fifth wheels, travel trailers, and camper vans. A sound plan may call for roof work, sealant removal, panel repair, paint matching, or part replacement. That range makes RV-specific skill central to a complete repair.
Roof-mounted air conditioners, vents, antennas, and solar gear create more points to inspect. Hail can harm a cover or the seal beneath it. The repair plan must address both the visible part and the weatherproof joint.
Choosing the right repair approach
Repair options differ in inspection depth, equipment, and claim support. The right facility should explain what it found, what the insurer can review, and how each damaged RV system will be repaired.
| Repair option. | Typical focus. | RV system depth. | Claim documentation. |
|---|---|---|---|
| Generic auto body shop. | Metal dents and paint. | May be limited. | Usually auto-focused. |
| RV dealership. | Brand parts and general service. | Varies by shop. | Process may vary. |
| Specialized RV repair center. | Roof, seals, walls, paint, and panels. | Whole-RV inspection. | Damage-based repair plan. |
Ask whether the estimate separates roof, sealant, sidewall, paint, body panel, and equipment damage. A detailed scope helps an adjuster see why each repair belongs in the claim. This guide to insurance claim repair estimates explains what supports an accurate repair plan.
Documentation that supports the claim
Good RV insurance claim repair starts with clear records. Photograph the roof, every side, damaged vents, trim, windows, and any signs of water entry. Keep wide views and close details so the location of each impact stays clear.
The Texas Department of Insurance advises owners to file promptly, take photos and video, and prevent more damage. It also recommends getting more than one repair estimate. Save receipts for temporary steps taken to keep rain out.
An RV-specific facility can turn those records into an inspection-based scope. That scope should connect each damaged part to the needed labor, materials, and repair method. It gives the owner and insurer a clearer basis for reviewing the claim.
How to choose a repair center that works with insurance companies
Whole-RV inspection and clear records
Choose a repair center that inspects more than the most visible dent or scrape. A collision or storm can affect the roof, seals, body panels, paint, trim, and nearby RV systems. The first inspection should connect each damaged area to a clear repair plan.
Ask how the center records damage before work starts. Useful records include labeled photos, written findings, measurements, parts needs, labor details, and notes about hidden damage. The Texas Department of Insurance advises owners to take photos and video of damage and make a list of affected areas.
A detailed estimate should explain the work rather than present one large total. It also gives the insurer better information for reviewing the loss. Owners can learn what to expect from insurance claim repair estimates before choosing a facility.
Insurance communication without confusion
Ask who will send estimates, photos, and added repair findings to the insurance company. A capable center should know how to organize that material and answer repair questions from the adjuster. It should also explain which decisions still belong to you and your insurer.
The repair center should never promise that every item will be covered. Coverage depends on the policy and the insurer’s review. Instead, look for a team that separates confirmed repair needs from coverage questions and keeps its records factual.
- Ask how the team handles added damage found after work begins.
- Confirm how often you will receive claim and repair updates.
- Request copies of estimates, approvals, and major change notes.
- Make sure no repair outside the approved plan starts without your consent.
One repair plan and steady updates
An RV insurance claim repair may involve several trades. Roof work, body repair, paint matching, seal replacement, and system checks must follow the right order. A center that manages these tasks together can reduce gaps between the inspection, insurer review, and repair work.
Patriots RV Services works with insurance companies and handles RV paint, body, and collision repair at its Krum facility near Denton, TX. The team can inspect the RV, prepare repair records, communicate claim-related details, and keep the owner informed as work moves forward.
Before authorizing work, ask for one main contact and a clear update schedule. You should know when the inspection is complete, when documents go to the insurer, and when approvals or added findings affect the timeline.
Frequently Asked Questions
Does RV insurance cover repairs after hail or collision damage?
Coverage depends on the policy, the cause of damage, and the selected deductible. Collision coverage may apply after a crash, while comprehensive coverage commonly addresses hail and other non-collision losses. The Texas Department of Insurance says comprehensive auto coverage should pay for hail damage. Review the RV policy and confirm coverage with the insurer before authorizing permanent repairs.
What should I document for an RV insurance repair claim?
Photograph and record video of every damaged area before cleanup or repairs. Capture wide views and close-ups of the roof, siding, windows, interior, and affected RV systems. Note the incident date, location, weather, and any collision details. The Texas Department of Insurance recommends documenting damage inside and outside. Save receipts for towing, temporary protection, and other claim-related costs.
How do I get an inspection and estimate for my RV repair claim?
Choose an RV repair facility that can inspect the roof, structure, body, seals, and installed systems, not only visible dents. Request a detailed written estimate that separates labor, parts, materials, and related damage. Give the estimate and inspection findings to the adjuster. The Texas Department of Insurance advises getting more than one repair estimate so owners can compare offers.
How should I sequence RV repairs after an insurance claim?
First, report the loss and document all damage. Next, prevent added damage with temporary measures, but keep receipts and avoid permanent work unless the insurer approves it. Then arrange a professional inspection, submit the estimate, and address any differences with the adjuster. Schedule repairs after the scope is approved. Finish with a quality inspection that confirms structural, roof, body, and system repairs are complete.
What are common reasons an RV insurance claim is denied?
An RV claim may be denied when the policy excludes the cause, required coverage was not selected, or damage resulted from wear or poor maintenance. Late reporting, weak documentation, and repairs completed before inspection can also complicate review. Read the denial letter and compare it with the policy. Ask the insurer for a clear written explanation and provide missing records or inspection findings when appropriate.
Ready to Schedule Your RV Claim Inspection?
Waiting after hail or collision damage can make documentation harder and may allow hidden problems to worsen before repairs begin. Starting now gives your repair team time to inspect every affected area, prepare a clear estimate, and sequence specialized work correctly. An early inspection also helps you organize claim details and move toward safe, complete repairs with fewer avoidable delays.
Ready to protect your RV and move your claim forward? Call (940) 290-7800 to schedule an RV insurance claim repair inspection with Patriots RV Services in Krum, near Denton, Texas. Bring your photos, claim information, and insurer correspondence so the team can review the damage, identify repair priorities, and explain the next practical steps.