

How to Repair RV Roof Leak: Quick and Easy Solutions
Fixing an RV roof leak starts with a careful inspection to locate cracks and identify where water is getting in. You’ll need basic tools like a putty knife, quality sealant, and proper safety equipment before climbing up. Once you’ve cleared away any debris and cleaned the roof surface, apply the sealant liberally—make sure to cover an area larger than the visible damage. Work it smooth for consistent coverage, then double-check you haven’t missed any spots. The real test comes when you spray the area with water and examine the interior of your RV for any signs of continued leaking. While many RV owners can handle minor repairs themselves, complex roof damage often requires the expertise of an excellent RV body shop to ensure a lasting fix.
Identifying the Leak Source
Let’s begin by thoroughly inspecting the RV roof to pinpoint the exact source of the leak. Start by examining the roof seals, seams, vents, and any accessories installed on the roof, including components like slide-outs that may require Vroom Slide System installation if not functioning properly. Look for cracks, gaps, or any signs of wear and tear. Water stains inside the RV can help narrow down the search area. If the leak is not immediately visible, consider using a water hose to simulate rainfall and have a partner inside the RV to spot the exact location where water enters. Mark the spot carefully for future reference. Taking the time to accurately identify the source of the leak is essential for a successful repair job.
Gathering Necessary Tools and Materials
To properly execute the repair work, make sure you have on hand all the necessary tools and materials required for fixing the RV roof leak. You will need items such as a putty knife, RV roof sealant, self-leveling sealant, gloves, safety goggles, a ladder, and a clean cloth. The putty knife is vital for removing old sealant and debris, ensuring a clean surface for the new sealant. RV roof sealant is essential for patching up any cracks or holes in the roof, while self-leveling sealant helps create a smooth finish. Gloves and safety goggles protect your hands and eyes during the repair process. A sturdy ladder is needed to access the roof safely, and a clean cloth is useful for wiping off excess sealant.
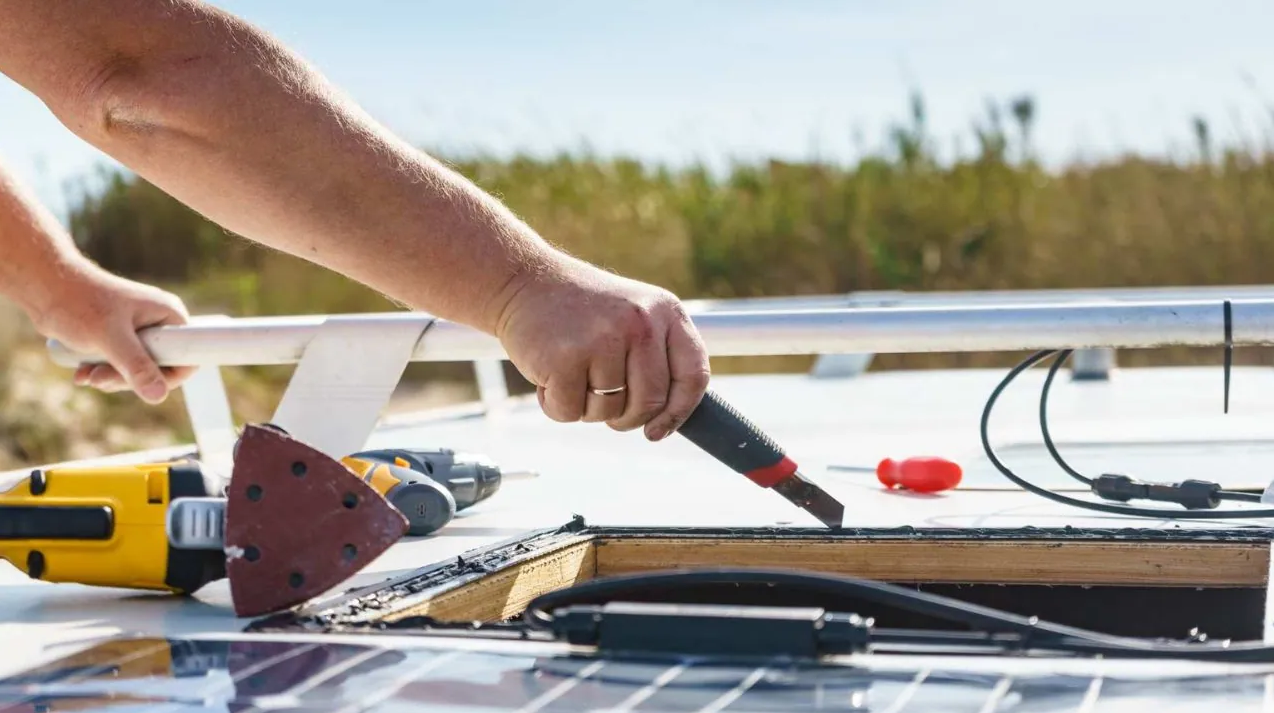
Preparing the Roof Surface
Begin by thoroughly cleaning the roof surface using a mild detergent and water to remove any dirt, grime, or debris. This step is vital as it ensures proper adhesion of the sealant later on. Use a soft-bristle brush or a sponge to scrub the surface gently. Pay close attention to seams, corners, and around any fixtures on the roof. Rinse the roof thoroughly and allow it to dry completely before proceeding. Inspect the surface for any signs of damage such as cracks or peeling sealant, especially around fixtures like vents and RV roof AC repair units where leaks commonly occur. Address any issues found before moving forward with the repair. A clean and well-prepared roof surface is essential for a successful and long-lasting repair job.
Applying Sealant to the Leak Area
After thoroughly preparing the roof surface, the next step involves applying sealant to the leak area. When applying sealant, make sure the area is clean and dry to promote adhesion. Use a caulking gun to apply a substantial amount of sealant directly over the leak, extending a few inches beyond the damaged area to create a watertight seal. Smooth out the sealant with a putty knife to ensure it covers the leak completely and adheres well to the surface. Allow the sealant to dry according to the manufacturer’s instructions before inspecting for any missed spots or areas needing additional sealant. Proper application of sealant is essential to effectively repair the RV roof leak and prevent future water infiltration.
Inspecting and Testing the Repair
How do we ensure that the repair has been successful in stopping the RV roof leak? Once the repair has been made, it is essential to inspect and test it thoroughly to verify its effectiveness. You may also consider scheduling a professional RV inspection service to ensure no other issues are overlooked. Here are five key steps to follow:
– Visual Inspection: Carefully examine the repaired area for any signs of cracks, gaps, or uneven sealant application.
– Water Hose Test: Spray water on the repaired section from different angles to simulate rain and check for any leaks.
– Interior Check: Inspect the interior of the RV for any signs of water intrusion or dampness.
– UV Light Examination: Use a UV light to detect any hidden leaks that may not be visible to the naked eye.
– Reapply Sealant if Necessary: If any issues are found, reapply sealant and repeat the testing process.
For RVs built on a diesel platform, water leaks could potentially affect wiring or other systems integrated into the frame. If you notice performance issues following a leak, it may be time to look into RV diesel chassis repair to prevent further damage.