

How to Install Solar Panels on Your RV
Installing solar panels on your RV can provide you with a reliable, sustainable power source during your travels. By following the right steps and choosing the correct components, you can set up an efficient solar power system that meets your energy needs. This guide will walk you through the entire process, from evaluating your energy requirements to installing the panels and monitoring system performance. For any issues during installation or setup, mobile RV repairs can provide convenient, on-site assistance. With their help, you can ensure your solar system is properly integrated and functioning smoothly.
Assessing Your RV’s Solar Needs
Before installing solar panels on your RV, the first step is to assess your energy needs. Start by calculating the total daily energy consumption of all devices you plan to power, such as appliances, lighting, electronics, and water pumps. Consider the wattage of each item and estimate how long each will be used per day. Don’t forget to account for potential future upgrades to energy-efficient devices, as well as changes in your travel habits. By analyzing your daily energy usage and factoring in typical weather conditions of the regions you frequent, you can determine the appropriate solar panel capacity needed for your RV’s system.
Selecting the Right Solar Panels
Choosing the right solar panels is essential to maximizing energy production for your RV. Consider the following factors when selecting solar panels:
- Efficiency: Look for panels with high efficiency ratings to ensure optimal power generation.
- Durability: Choose panels that are built to withstand various weather conditions, especially if you frequently travel to different climates.
- Size: Measure the available space on your RV roof to determine the ideal panel size.
- Type: Consider different panel types, including monocrystalline, polycrystalline, and thin-film panels based on efficiency, cost, and installation needs.
Selecting the right panels tailored to your specific RV solar power system needs will ensure a reliable, long-lasting setup.
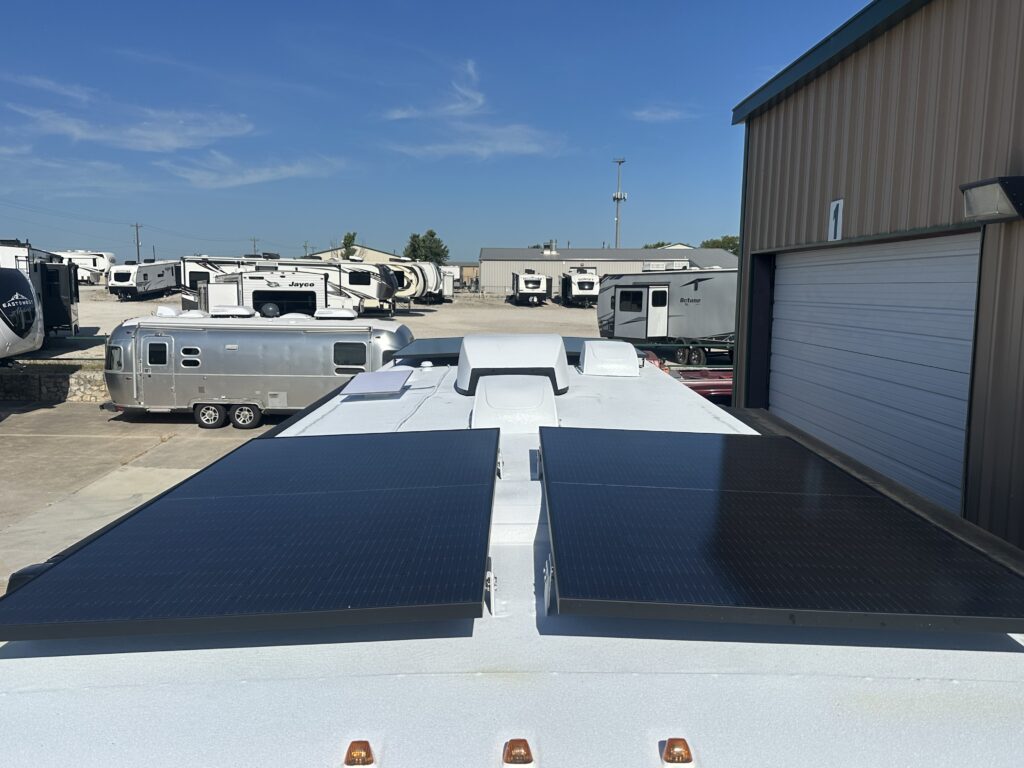
Planning the Solar Panel Placement
Optimal placement of your solar panels is key to maximizing energy production. Typically, south-facing roofs receive the most sunlight, so it’s ideal to place panels facing this direction. If tilting the panels isn’t possible due to roof shape or other obstructions, aim for a tilt angle close to your geographical latitude. Make sure to avoid placing the panels near vents, air conditioners, or other obstructions that could cause shading. Shading can dramatically reduce solar panel output, leading to decreased system efficiency. Furthermore, consider leaving enough space for easy access to panels for cleaning and maintenance. By strategically positioning your panels, you’ll ensure that they capture the maximum amount of sunlight.
Installing the Solar Charge Controller
A solar charge controller is essential for maintaining your RV’s battery and ensuring that it is charged efficiently without overcharging or undercharging. Here’s how to properly install the controller:
- Choose the Right Controller: Select a charge controller that matches your panel’s voltage and battery bank capacity. A MPPT charge controller is recommended for maximum efficiency, especially with larger systems.
- Mounting the Controller: Install the controller in a well-ventilated area close to your batteries to prevent overheating and energy loss.
- Wiring the Components: Follow the manufacturer’s guidelines for connecting your panels, batteries, and controller. This ensures a safe and efficient electrical setup.
- Test and Monitor: After installation, test the controller regularly and check its indicators to ensure it is functioning correctly.
Connecting the Solar Panels to the RV
Once you’ve chosen the location for your solar panels and installed the charge controller, it’s time to connect the system to your RV’s electrical system. Start by connecting the positive and negative terminals of the solar panels to the charge controller, using the appropriate gauge wires. Be sure to insulate all connections with heat shrink tubing or electrical tape to prevent any energy loss. Secure the cables neatly to avoid snags or exposure to weather. Double-check all connections before securing them in place to ensure proper energy flow. A properly connected system will help maximize the energy efficiency of your solar setup.
Testing and Monitoring the Solar System
To ensure your RV solar system operates efficiently over time, regular testing and monitoring are essential. Here’s how to effectively manage your system:
- Measure Solar Panel Output: Use a multimeter to check the voltage and current output of your panels to verify that they are generating the expected power.
- Monitor Battery Health: Use a battery monitor to track your battery levels and ensure they don’t overcharge or discharge too deeply, which can damage the battery.
- Inspect Wiring and Connections: Regularly inspect all wiring and connections for signs of wear or corrosion. Loose connections can negatively impact your system’s performance.
- Install a Monitoring System: Consider using a solar monitoring system to view real-time data on your system’s performance, so you can quickly detect and address any issues.
Contact Us
At Patriots RV Services, we’re here to ensure your RV is road-ready and reliable. Whether you’re facing slide-out issues, roof leaks, or need a complete overhaul, our veteran-owned team is dedicated to providing top-notch service with integrity and care.
📍 Visit Us: 11399 US-380 W, Krum Texas 76249
📞 Call or Text: 940.399.5734
📧 Email Us: [email protected]
If you’re sick and tired of the big box RV repair shops, give us a chance! We will not let you down. Contact Us today!
Related Topics: