

How to Repair Tear in RV Roof: Quick and Easy Fixes
RV roof tears can happen to any recreational vehicle owner and need quick attention to prevent water damage. This guide walks you through the simple steps to fix a tear in your RV roof using basic tools and materials. You’ll learn how to check the damage, get the right supplies, clean the area, apply a patch, and finish the job properly. These repair methods help you save money and avoid costly damage that professional RV service technicians typically handle.
Assessing the Damage
Start by looking closely at the tear in your RV roof to see how bad the damage is. Check the size of the tear and see if it has clean edges or frayed parts. Look at where the tear is located – is it near a seam or in an area that’s already damaged? Notice what type of roof material you have, since this affects how you’ll fix it. Look for signs of water getting in or mold growing around the tear. Check if there are vents, antennas, or other things nearby that might make it harder to repair. This careful look at the damage helps you pick the right way to fix your RV roof.
Gathering Necessary Supplies
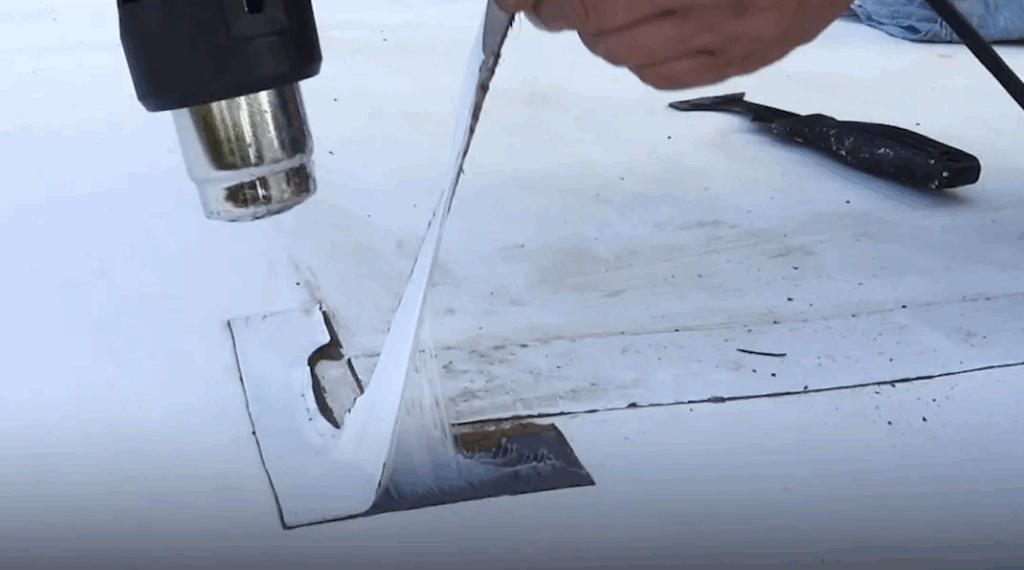
Before you start fixing the tear, collect all the supplies you’ll need for the job. You’ll need a patch kit made for RV roofs, a putty knife to spread sealant, a clean cloth to wipe the area, and gloves to protect your hands. Get a good cleaner to prep the surface, a ladder to reach the roof safely, and a utility knife for cutting. You’ll also need a caulking gun to apply sealant evenly, a heat gun to activate the patch adhesive, and a measuring tape for accurate sizing. Have a broom ready to clean up debris before you start the repair work.
Cleaning the Area
Once you have all your supplies ready, clean the area around the tear thoroughly.
Follow these simple steps to clean properly:
- Remove Debris: Gently brush away loose dirt, leaves, or debris from the damaged spot.
- Use a Mild Cleaner: Mix mild soap with water, then apply it to the area using a soft sponge or cloth.
- Scrub Gently: Use gentle circular motions to scrub and remove grime or residue that could stop the patch from sticking well.
- Rinse and Dry: Rinse the area with clean water and let it dry completely before adding the patch.
Applying the Patch
Place the adhesive patch carefully over the clean, dry area of the RV roof tear. Make sure the patch lines up with the tear edges for a strong bond. Press down firmly on the patch, starting from the center and moving outward to remove air bubbles and ensure good adhesion. Once the patch is in place, use a roller or flat object to smooth it out and create a tight seal. Make sure the patch sticks securely to prevent water leaks. Let the adhesive cure completely, following the manufacturer’s directions, before doing anything else. This step is important for a successful, long-lasting repair.
Finishing Touches
After securing the adhesive patch over the tear, complete these final steps for a strong and lasting repair:
- Smooth Out Edges: Gently press down on the patch edges to make sure they stick firmly to the roof surface.
- Apply Sealant: Use high-quality RV roof sealant around the patch edges for extra protection against water leaks.
- Check for Air Bubbles: Look carefully for any air bubbles trapped under the patch. If you find any, press them out to create a smooth finish.
- Allow for Proper Drying: Let the patch and sealant dry completely according to the manufacturer’s instructions before exposing them to moisture or weather.