
It’s the classic RV electrical mystery: your 12-volt system is on the fritz, but is it a dead battery or a faulty converter? Guessing wrong can be a waste of both time and money. Understanding the distinct roles these two components play is the key to a quick and accurate diagnosis. If you’re dealing with an RV converter not charging the battery, the symptoms can sometimes mimic those of a battery that just won’t hold a charge. This article will help you spot the difference, walking you through a step-by-step process to test each component and pinpoint the true source of your electrical woes.
Key Takeaways
- Know the Converter’s Role: Your RV converter acts as a power translator, changing 120-volt AC shore power into 12-volt DC power. This process is crucial for charging your house batteries and running essential systems like your lights, fans, and water pump.
- Check the Simple Fixes First: Before suspecting a major failure, always check for common, easy-to-fix issues. This includes looking for tripped breakers, blown fuses (especially those on the converter itself), an incorrect battery disconnect switch setting, and dirty battery connections.
- Use a Multimeter for a Definitive Test: A multimeter can confirm if your converter is the problem. A healthy, working converter should output between 13.2 and 14.4 volts DC. If your tests show a low or zero reading after checking the basics, it is a clear sign the unit needs professional service.
What Is an RV Converter and What Does It Do?
Think of your RV’s electrical system as having two different languages: the powerful 120-volt AC (Alternating Current) power you get from a campground hookup, and the gentler 12-volt DC (Direct Current) power that your RV’s batteries and many of its core systems use. Your RV converter is the essential translator between them. It’s a hardworking device that takes that high-voltage AC power from the shore power pedestal or a generator and transforms it into the 12-volt DC power your rig needs to function. This process is critical for two main reasons: it charges your house batteries, and it directly powers all the 12-volt appliances and systems inside your RV.
Without a functioning converter, plugging into shore power won’t do you much good. Your lights will be dim, your water pump will struggle, and most importantly, your batteries won’t charge. This can leave you without power when you need it most, especially if you plan to do any boondocking. Understanding what your converter does is the first step in diagnosing any electrical issues you might encounter on the road. It’s one of the most common points of failure in an RV’s electrical system, but with a little knowledge, you can often spot the signs of trouble before they ruin your trip. If you ever suspect a problem with your RV’s electrical components, getting a professional inspection is a great way to ensure everything is working safely and correctly as part of your routine RV services and repairs.
The Converter’s Role in Your RV’s Electrical System
Your RV converter is the heart of your 12-volt system when you’re connected to shore power. Its primary job is to provide a steady, reliable stream of DC power to run all the essentials that make your RV feel like home. This includes your interior lights, the water pump for your sinks and shower, the fan for your furnace, your refrigerator’s control panel, and even your slide-out motors. When you’re plugged in at a campsite, the converter is what allows you to use all these things without draining your house batteries. It essentially bypasses the batteries and powers these systems directly, while also sending a charge to top them off.
AC vs. DC Power: What Your Battery Needs
Keeping your RV batteries charged is fundamental to a stress-free adventure. Your batteries operate on 12-volt DC power, which is a steady, low-voltage current. However, the power coming from a campground outlet is 120-volt AC power, a much higher voltage that alternates direction. You can’t just plug your DC battery into an AC outlet; it needs the power to be converted first. That’s exactly what your converter does. It takes that AC power and safely steps it down to the DC voltage your batteries require for charging. If your converter isn’t working properly, your batteries won’t get the power they need, which is especially critical for anyone interested in RV solar and off-grid solutions.
Converter vs. Inverter: What’s the Difference?
It’s easy to mix up converters and inverters, but they perform opposite functions. As we’ve covered, a converter changes 120-volt AC power into 12-volt DC power. An inverter does the exact reverse: it takes 12-volt DC power from your batteries and “inverts” it into 120-volt AC power. You need an inverter to run household appliances like your microwave, coffee maker, or television when you are not plugged into shore power. While most RVs come standard with a converter, an inverter is often an optional add-on. Knowing the difference is key to troubleshooting. If your 12-volt lights aren’t working while plugged in, the converter is a likely suspect. If your TV won’t turn on while boondocking, the issue might be with your inverter.
Is Your RV Converter Failing? 3 Telltale Signs
Your RV’s converter is a hardworking component, but it won’t last forever. When it starts to fail, it usually doesn’t just quit on the spot. Instead, it gives you little warnings that something is wrong. Paying attention to these clues can help you address the problem before you’re left in the dark (literally). If you notice any of these telltale signs, it might be time to investigate your converter and see if it needs a professional look.
Dim or Flickering Lights
One of the most common signs of a struggling converter is your interior lights dimming or flickering. If your lights seem moody, it’s not because your RV is haunted; it’s likely because the converter isn’t providing a steady, adequate flow of 12-volt power. This can happen randomly or when you turn on another appliance. While it might just seem like a minor annoyance, it’s a clear signal that your electrical system is under stress. Ignoring it can lead to bigger issues that require more extensive RV services and repairs down the road.
Weak Water Pump and Slow Fans
Your lights aren’t the only things that rely on the converter. Pay attention to other 12-volt appliances, like your water pump and vent fans. Have you noticed the water pressure in your shower is weaker than it used to be? Or maybe the fans are spinning slower and not moving as much air? These are classic symptoms of a converter that can’t keep up with the power demand. It’s not providing enough juice to run these components at full strength, which is a strong hint that it’s on its way out.
Low Voltage After Charging Overnight
This sign requires a multimeter, but it’s one of the most definitive. After being plugged into shore power all night, your house batteries should be fully charged. A healthy, fully charged 12-volt battery will read between 12.6 and 12.8 volts. If you test your battery and it consistently reads below 12.6 volts, your converter is likely the culprit. It’s failing to properly charge the battery, leaving you with less power than you need. This is especially critical for anyone interested in reliable off-grid boondocking solutions.
Why Isn’t My RV Converter Charging? Common Culprits
When your RV’s battery isn’t charging, it can bring your trip to a standstill. The converter is often the source of the problem, but the fix can be surprisingly simple. Before you assume the worst, it’s worth checking a few common culprits that might be preventing your converter from doing its job. These issues range from a simple flipped switch to a component that needs replacing. Let’s walk through the most frequent reasons your RV converter might not be charging your battery.
Tripped Breakers and Blown Fuses
The first place you should always look is your RV’s power panel. A tripped circuit breaker is a very common reason for a converter to stop working. Find the breaker that supplies 120-volt power to your converter and check if it has been tripped. If it is, simply reset it. Additionally, many converters have their own fuses, sometimes one or two for reverse polarity protection. These are often located directly on the converter unit itself, not in your main fuse box. If a breaker or fuse blows repeatedly, it signals a deeper issue that may require professional RV services and repairs.
The Battery Disconnect Switch Is Off
It’s an easy mistake to make, but one that will definitely keep your battery from charging. Most RVs have a battery disconnect switch (sometimes labeled ‘store’ or ‘use’) that isolates the battery from the 12-volt system to prevent it from draining during storage. If this switch is in the ‘off’ or ‘store’ position, the converter cannot send a charge to the battery, even when you’re plugged into shore power. Make sure the switch is set to the ‘on’ or ‘use’ position. It’s a simple check that can save you a lot of unnecessary troubleshooting and stress.
Corroded or Loose Wiring
For electricity to flow properly, it needs a clean, secure path. Over time, battery terminals and wiring connections can become corroded, loose, or dirty. This corrosion acts as a barrier, preventing the converter’s charge from reaching the battery. Put on some safety glasses and gloves, then carefully inspect your battery terminals and the ground connection to the RV frame. Look for any rust, white or greenish buildup, or loose cables. Cleaning corroded terminals with a wire brush and ensuring all connections are tight can often restore the flow of power and solve your charging problems.
Overheating from Poor Ventilation
Your RV converter works hard, and that work generates heat. To keep it from getting too hot, most converters have a built-in cooling fan. However, if the converter is installed in a cramped, poorly ventilated space, it can easily overheat. When a converter gets too hot, its internal safety features may reduce its charging output or shut it down completely to prevent damage. Check to see if your converter’s fan is running. Also, make sure the area around the unit is clear of blankets, storage items, or anything else that could block airflow and cause it to overheat.
A Failing Converter
If you’ve checked all the breakers, switches, and wires and everything seems fine, you might be dealing with a failing converter. Like any electronic component, converters have a limited lifespan and can eventually wear out, especially in older RVs. A key sign of failure is when the converter is receiving 120-volt power from shore power but is not putting out the necessary 13 to 14 volts of DC power to charge the battery. You can test this with a multimeter. If the output is low or nonexistent, it’s likely time for a replacement. This is a job where professional help ensures everything is installed safely and correctly.
Is It the Converter or the Battery?
When your RV’s 12-volt system acts up, it’s easy to get stuck in a frustrating guessing game. Is the converter failing, or has your battery finally given up? It’s a classic chicken-or-egg scenario. Pinpointing the real culprit is key to getting a fast, effective fix instead of just replacing parts and hoping for the best. Let’s break down how to tell the difference so you can get back to enjoying your travels.
Spotting the Difference: Bad Converter vs. Dead Battery
If your battery isn’t charging when you’re plugged into shore power, start with the simple stuff. A non-charging converter often points to blown fuses, a tripped breaker, or a battery disconnect switch that’s accidentally been turned off. These are quick checks you can do yourself. On the other hand, if your battery seems to charge up but dies surprisingly fast, the problem is a bit murkier. It could mean the converter isn’t delivering a proper charge, or the battery itself is old and can no longer hold one. A healthy battery should power your 12V items for a good while, so a rapid drain is a major red flag that something in the charging system is off.
Does Your Battery Type Matter? (Lead-Acid vs. Lithium)
Yes, your battery type absolutely matters. Many older RVs came with converters designed specifically for lead-acid batteries. If you’ve upgraded to a modern lithium (LiFePO4) battery as part of an RV solar/off-grid/boondocking setup, your old converter may not be able to charge it properly. Lithium batteries require a different charging profile to reach their full potential and maintain their health. For example, a fully charged lithium battery will rest around 13.2 to 13.4 volts, while an older converter might not push the voltage high enough during the charging cycle. This mismatch can leave you with a perpetually undercharged battery, making you think it’s failing when it’s really the converter that’s incompatible.
What Are Parasitic Loads and How Do They Drain Your Battery?
Parasitic loads are the little energy vampires in your RV’s electrical system. These are devices that draw a small amount of power continuously, even when you think everything is turned off. Common culprits include propane detectors, stereo clock displays, and appliance control boards. While each draw is tiny, they add up over time and can drain your battery faster than the converter can replenish it. This can create the illusion of a bad battery or a faulty converter. If your battery charges quickly but also dies quickly, and you’ve ruled out other issues, you might have a significant parasitic draw or a battery that’s simply reached the end of its life. Diagnosing these small drains can be tricky, but it’s a standard part of professional RV services and repairs.
How to Troubleshoot Your RV Converter: A Step-by-Step Guide
When your RV’s lights start to dim even while you’re plugged in, the converter is often the first place to look. This guide will walk you through the essential troubleshooting steps to figure out what’s going on with your electrical system. With a little patience and a multimeter, you can often diagnose the problem yourself.
Step 1: Check Your Shore Power
Before you start taking things apart, let’s make sure power is getting to the converter in the first place. Start at the source: the shore power pedestal. Confirm the breaker is on. Next, move to your RV’s main breaker panel and find the one labeled for the converter (it might say “CONV”). Make sure it hasn’t tripped. If everything looks okay, you can use a multimeter to test for 120-volt AC power at the outlet your RV is plugged into. If there’s no power, you’ve found your culprit without even touching the converter.
Step 2: Inspect Fuses, Breakers, and Switches
If the converter is getting power, the next step is to check the components that protect the 12-volt system. Your converter has one or two reverse polarity fuses right on the unit itself. These are designed to blow if a battery is connected backward, so they are a common failure point. Also, trace the wiring from your converter to the battery, looking for any inline fuses or resettable breakers that might have tripped. Don’t forget the simplest solution of all: check that your battery disconnect switch is in the “On” position to allow power to flow.
Step 3: Examine Battery Terminals and Connections
A clean, tight connection is critical for your battery to receive a charge. Open your battery compartment and take a close look at the terminals. If you see a crusty, whitish-green powder, that’s corrosion, and it can easily block the flow of electricity. You can clean it off with a wire brush and a simple paste of baking soda and water. While you’re there, give the cable clamps a firm wiggle. They should be completely secure. Finally, trace the negative (black) cable to where it grounds to the RV frame and make sure that connection is also clean and tight.
Step 4: Test the Battery Voltage
Your battery’s current state of charge can reveal a lot. Grab your multimeter, set it to DC voltage, and place the probes on the correct battery terminals. A fully charged 12-volt battery should read between 12.6 and 12.8 volts. If your reading is very low, say under 11 volts, the battery might be too drained for the converter to recognize it. Some modern converters have a safety feature that prevents them from charging a deeply depleted battery. This test helps you know if you have a converter issue or a battery that needs professional RV services and repairs.
Step 5: Measure the Converter’s Output Voltage
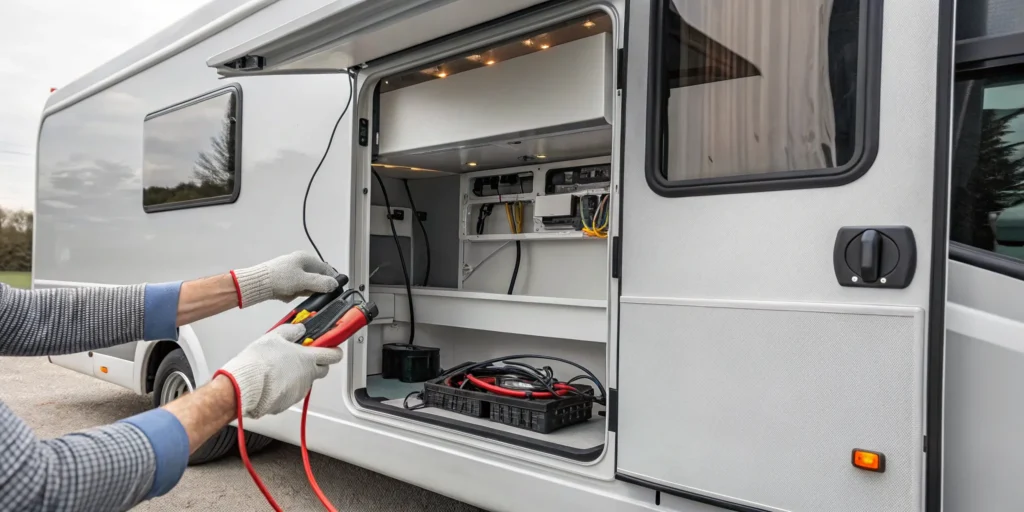
This is the moment of truth for your converter. To get an accurate reading, you need to isolate it from the battery. First, unplug your RV from shore power and disconnect the cables from your battery terminals. Now, plug your RV back in. With your multimeter on the DC voltage setting, carefully touch the probes to the disconnected battery cables (the ones leading from the converter). A healthy converter should put out between 13.2 and 14.4 volts. If you get a reading of zero or something very low, the converter has likely failed.
Step 6: Look for Signs of Overheating
Your converter has a cooling fan to keep it from getting too hot while it works. When your RV is plugged in, you should hear this fan kick on from time to time. If you hear a constant loud humming or grinding, it could be a sign the fan is failing or the unit is struggling. Place your hand near the converter; it might feel warm, but it should never be too hot to touch. A burning smell is another major red flag. Overheating can point to poor ventilation or internal failure, signaling it’s time for a professional inspection of your RV’s electrical system.
Common Troubleshooting Mistakes to Avoid
When you’re trying to solve an electrical puzzle, it’s easy to get turned around. You can follow all the right steps but still miss the mark if a common oversight trips you up. Before you throw in the towel, make sure you haven’t made one of these frequent troubleshooting mistakes. Getting it right often means knowing what not to do.
Forgetting the Converter’s Own Fuses
It’s one of the most common slip-ups we see. You’ve checked the main fuse panel, and everything looks good, so you assume the fuses aren’t the problem. However, many converters have their own set of fuses located directly on the unit itself. These fuses are separate from your RV’s main distribution panel. If one of these blows, your converter will stop charging the battery even if all other systems seem fine. Before you assume the entire converter has failed, take a moment to locate the unit and inspect it for its own dedicated fuses. This simple check can save you a ton of time and frustration.
Misreading Your Multimeter
A multimeter is an essential tool for any RV electrical diagnosis, but it only works if you interpret the readings correctly. A frequent mistake is misunderstanding what the numbers mean. When testing your battery, a fully charged 12-volt battery should read between 12.6 and 12.8 volts. A reading below that after a full night on shore power points to a problem. It’s also important to know that you can’t measure amperage (the flow of current) by simply placing the probes on a wire. That requires a different setup. If you’re not confident in your readings, our team can handle all kinds of RV services and repairs to pinpoint the issue accurately.
Ignoring the Age of Your Converter
Sometimes, the simplest answer is the right one: your converter might just be old. Like any electronic component, converters have a finite lifespan. If your RV is a vintage model, there’s a good chance its converter has reached the end of its service life. Older converters are also far less efficient than modern multi-stage “smart” converters. They can struggle to charge batteries properly and may even cause damage by overcharging them. If you’ve ruled out other issues and your converter is more than a decade old, it’s probably time for a replacement. Upgrading isn’t just a fix; it’s an investment in your RV’s long-term electrical health.
When to Call a Pro for RV Electrical Repairs
Tackling an RV project yourself can be incredibly satisfying, but electrical systems are a different beast. They are complex, and a small mistake can lead to bigger, more expensive problems or even create a safety hazard. Knowing your limits and recognizing when to call in a professional is the smartest move any RV owner can make. If you’ve run through the basic troubleshooting steps and are still scratching your head, it’s probably time to let an expert take the reins.
Sometimes, the problem is more complex than a simple DIY fix can handle. Don’t risk causing more damage to your RV’s electrical system. Getting professional RV services and repairs ensures the job is done right the first time, giving you peace of mind for your future travels. When you’re dealing with the heart of your RV’s power, it’s always better to be safe than sorry.
Warning Signs It’s Not a DIY Job
If you notice several issues happening at once, it’s a major red flag. For example, are your lights flickering, your battery dying even while plugged into shore power, and you hear a strange humming noise? A combination of symptoms usually points to a deeper issue than a single blown fuse. Similarly, if your RV is an older model, the converter may have simply failed due to age. A professional can not only confirm this but also recommend a modern, efficient replacement that’s right for your rig. When you’ve tried all the easy fixes and are still stuck, it’s time to call for backup.
What to Expect from a Professional Inspection
When you bring your RV to a technician, they’ll start with a thorough diagnostic process, so you can finally stop guessing. They will use a multimeter to get precise voltage readings from your battery and converter, immediately telling them if components are performing as they should. Next, they’ll conduct a complete visual inspection of your charging system, checking all the wires, fuses, and connections for hidden damage or corrosion. This expert diagnosis will pinpoint the exact cause of the problem, whether it’s a bad converter, a failing battery, or a loose ground wire you might have missed.
Solve Your RV Electrical Issues with Patriots RV Services
Dealing with electrical problems in your RV, especially when your converter stops charging the battery, can really put a damper on your travel plans. While it’s tempting to worry, many issues have straightforward solutions you can check yourself. Before you call for backup, a few simple checks can often get you powered up and back on the road.
Start by looking for the most common culprits. The first thing to check is for blown fuses, specifically the reverse polarity fuses on the converter itself, which can blow if a battery was connected incorrectly. Next, find your main panel and confirm the 120-volt circuit breaker that powers the converter hasn’t tripped. Sometimes, a simple flip of a switch is all you need. You should also inspect your battery terminals for any corrosion or loose wiring, as clean and secure connections are essential for a proper charge.
If you’ve run through these basic troubleshooting steps and your battery still isn’t charging, the issue likely runs deeper. RV electrical systems are complex, and working on them without experience can be unsafe. That’s where our team at Patriots RV Services comes in. We handle everything from diagnosing tricky converter failures to installing complete RV solar and off-grid upgrades. Our expert technicians can quickly and safely identify the root of the problem, so you can get back to your adventure with confidence. Don’t let a stubborn electrical issue sideline your trip; let us handle the hard stuff.
Related Articles
- Understanding Why Is My RV Battery Not Charging While Plugged In – Patriots RV Services
- Do I Need a Battery If My RV Is Plugged In: Exploring Power Needs for RVs – Patriots RV Services
- How to Test RV Battery: Troubleshooting Your RV Power System – Patriots RV Services
- RV Solar FAQ – Patriots RV Services
Frequently Asked Questions
My RV converter is making a humming sound. Is that normal? A soft, intermittent humming is usually just the sound of the internal cooling fan doing its job, which is perfectly normal. However, if the sound is a loud, constant buzzing or a grinding noise, it could signal that the fan is failing or the converter itself is under strain. A converter that’s too hot to touch is another warning sign. If the noise is new or concerning, it’s best to have it checked out.
I just upgraded to lithium batteries. Do I really need a new converter too? Yes, it’s a very good idea. Most factory-installed converters are designed for traditional lead-acid batteries and don’t have the right charging profile for lithium (LiFePO4) batteries. Using an old converter can result in undercharging your new, expensive batteries, which means you won’t get the performance you paid for. A modern, lithium-compatible converter will charge them correctly, helping them last longer and perform better.
Is it safe for me to replace my own RV converter? While some experienced RVers might tackle this job, we generally recommend leaving it to a professional. Replacing a converter involves working with both 120-volt AC and 12-volt DC systems. A mistake can damage your new converter, other appliances, or even create a serious fire or shock hazard. A professional technician can ensure the new unit is installed safely and correctly, giving you total peace of mind.
If my converter is broken, can I still use my microwave when plugged into shore power? This is a great question that helps clarify the different electrical systems. Your microwave runs on 120-volt AC power, which comes directly from the shore power connection. Your converter’s job is to handle the 12-volt DC side of things. So, even if your converter has failed, your microwave and other 120-volt outlets should still work fine as long as you are plugged in. The problem is that your 12-volt lights, water pump, and batteries won’t get any power.
My converter seems to work, but it’s over 10 years old. Should I think about replacing it? It’s definitely something to consider. Older converters, especially single-stage models, are not great for your batteries. They can overcharge them, which boils off the water in lead-acid batteries and shortens their lifespan. Modern multi-stage “smart” converters are much more efficient. They charge your batteries faster and maintain them at a proper voltage without causing damage. Upgrading is a proactive way to protect your batteries and improve your whole electrical system.