
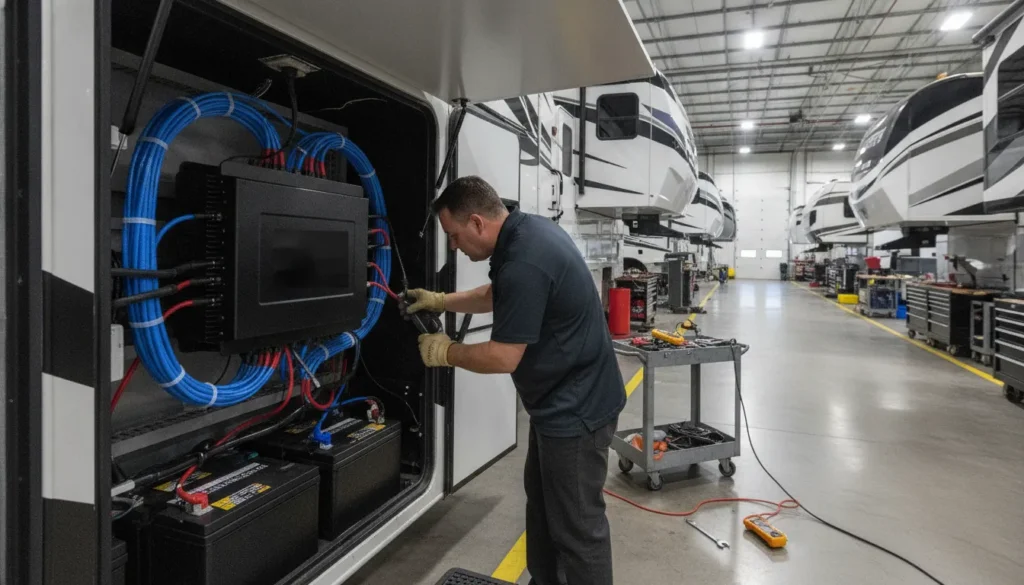
Adding lithium storage or solar to an RV can make off-grid travel more practical, but the alternator-to-house-battery connection must be designed as a complete electrical system. An uncontrolled connection can place unnecessary demand on the alternator, wiring, and battery equipment.
Contact Patriots RV Services at 940.251.3749 for a safety-focused charging system review.
RV DC-DC charger installation for lithium and solar starts with a vehicle-specific safety review.
RV DC-DC charger installation creates a controlled connection between the chassis charging system and the RV house battery bank. The charger regulates current and voltage, supports engine-off isolation, and helps match alternator charging to the battery manufacturer’s requirements. Patriots RV Services evaluates wiring, fusing, grounding, heat, enable logic, and the wider solar and lithium system for owners in Denton and North Texas.
The goal is not simply to add another charging device. It is to make alternator charging work with the vehicle, house bank, solar equipment, and the way the RV is actually used. The sections below explain the decisions that matter before a system is installed or changed.
How RV DC-DC Charger Installation Controls Alternator Charging
A DC-DC charger manages energy moving from the vehicle side to the house side. The alternator produces power while the engine runs, and the chassis battery supports starting and vehicle functions. The house battery bank powers RV loads such as lights, appliances, electronics, and inverters. The charger sits between those systems instead of treating them as one oversized battery.
That separation matters because lithium batteries can accept charging current readily. If the house bank is connected without appropriate current control, it may place a sustained load on an alternator and the conductors serving it. The correct response is not to assume that a larger charger is better. The system should be sized and configured around the vehicle, battery bank, wiring path, and manufacturer’s instructions.
Current limiting reduces electrical stress
Current limiting is one of the charger’s central jobs. A properly selected unit provides a defined transfer level rather than allowing the house bank to draw whatever the vehicle side can deliver. This can reduce stress on the alternator and helps the installer evaluate protection for the entire circuit. Current control does not replace inspection of the alternator, battery management system, or existing wiring. It is one part of a complete design.
Voltage regulation supports the battery profile
The charger can regulate or raise the input voltage so the house bank receives the voltage profile required by its chemistry and equipment. Lithium systems have charging requirements that differ from many lead-acid systems. The selected charger, battery management system, solar controller, inverter, and other equipment must be compatible. Patriots RV Services can coordinate this work with Victron Energy RV solar integration when alternator, solar, and lithium charging need to operate together.
Do You Need a DC-DC Charger for Lithium Batteries?
Many RV lithium upgrades benefit from a DC-DC charger, but no universal diagram fits every coach. The answer depends on the alternator, chassis design, existing charging equipment, house bank, cable run, battery management system, and intended use. A system that works in one RV may be unsuitable for another.
A DC-DC charger is often appropriate when an RV’s lithium house bank can draw more charging current than the original alternator circuit was intended to provide. Or when smart-alternator behavior makes a direct connection unreliable. The need and configuration still require a vehicle-specific review. Battery chemistry, existing isolation, cable routing, protection, and solar equipment all affect the final design.
Lithium compatibility requires more than a battery swap
Lithium batteries can accept current efficiently, which is useful while traveling between campsites. That same characteristic means the alternator may see a larger or longer demand than it experienced with the original battery type. The installer must consider the battery manufacturer’s charging limits, the battery management system’s behavior, and the charging equipment already connected to the house bank.
A battery bank also has to be considered as part of the RV’s total energy plan. Existing solar charging, inverter loads, shore charging, and generator charging may all connect to the same bank. Patriots RV Services can evaluate the broader system and related RV lithium battery bank sizing considerations rather than isolating the alternator circuit from the rest of the upgrade.
Smart alternators change the assessment
Some newer vehicles vary alternator output based on operating conditions. A voltage-sensing method that worked on an older charging system may not provide a reliable enable signal or charging voltage on a newer vehicle. The DC-DC charger may need an ignition or engine-running signal, depending on the equipment and vehicle. The final choice should follow the selected charger’s instructions and the vehicle’s electrical architecture.
This is also why an installation should not rely on a generic online wiring diagram. A diagram can illustrate the concept, but it cannot confirm the correct terminals, fuse locations, cable route, grounding method, or compatibility for a specific RV.
What Does Safe RV DC-DC Charger Installation Include?
A professional RV DC-DC charger installation begins with inspection and planning. The charger should not be placed wherever there happens to be room, and the cable should not be sized by guesswork. The design must account for the complete path from the source battery or approved vehicle connection to the charger and then to the house bank.
A safe installation includes a vehicle and battery assessment, a charger selected for the system. Properly sized conductors, protection near energy sources, secure connections, suitable grounding, protected routing, ventilation, and commissioning. It also confirms that enable logic prevents unwanted charging when the engine is off and that solar and shore systems remain compatible.
A typical planning sequence includes:
- Inspect the existing system. Identify the chassis battery, alternator arrangement, house bank, battery management system, isolators, solar controller, inverter, shore charger, and accessible connection points.
- Define the charging path. Confirm where power will be taken from, where the charger will be mounted, and where output will connect to the house bank or approved distribution point.
- Check the electrical requirements. Use the charger’s documentation and the vehicle and battery manufacturer’s requirements to determine conductor, protection, terminal, and enable-signal needs.
- Plan protection and routing. Keep protected conductors secure, away from heat and abrasion, with service access for inspection. Place overcurrent protection where the design requires it, commonly near energy sources.
- Commission the finished work. Confirm polarity, fasteners, grounds, voltage behavior, current behavior, enable logic, temperature, and charging interaction with the rest of the RV system.
The final design must follow the selected charger’s instructions, the battery manufacturer’s charging requirements. The vehicle’s alternator management system, the RV wiring, applicable electrical guidance, and other manufacturer specifications. Those requirements can differ by model, so this article is educational and not a substitute for a vehicle-specific installation review.
Why Do Wiring, Fusing, and Grounding Matter?
Wiring and protection determine whether the charging system can deliver power reliably and respond safely to a fault. A charger can be correctly selected and still be installed poorly if conductors are too small. Cable runs are unnecessarily long, terminals are loose, or protection is placed in the wrong location.
Wiring, fusing, and grounding matter because a DC-DC circuit carries sustained current through a vehicle environment that includes vibration, heat, moisture, and abrasion. Conductors must suit the planned current and distance, overcurrent protection must protect the cable, and connections must remain secure. A sound installation protects equipment while keeping voltage drop and fault risk under control.
| Design area | What the installer evaluates |
|---|---|
| Conductor sizing | Expected current, one-way distance, routing, insulation, temperature, and acceptable voltage drop. |
| Overcurrent protection | Protection appropriate to the conductor and equipment, positioned where the circuit design requires it. |
| Connections | Correct terminals, crimp quality, torque, strain relief, corrosion resistance, and service access. |
| Grounding and return paths | A deliberate return path suited to the vehicle and house system, rather than an assumed piece of chassis metal. |
| Cable routing | Clearance from exhaust and moving parts, protection from abrasion, secure support, and a route that can be inspected. |
Fuses protect conductors, not just devices
Overcurrent protection is selected as part of the circuit design. It should protect the wiring and equipment from a fault without creating nuisance interruptions during normal operation. The correct location depends on the source, cable route, and equipment instructions. Adding a fuse that looks close to the charger is not enough if a long unfused section remains exposed to a battery source.
Connections and grounds deserve a final inspection
Loose or contaminated connections can create resistance, heat, voltage drop, and intermittent charging. Grounding also deserves more than a quick assumption that any nearby metal point is suitable. Patriots RV Services can inspect the RV’s broader 12-volt and 120-volt electrical systems when the charging upgrade touches multiple circuits.
Do not copy a wiring diagram without confirming the equipment and vehicle. If the cable route, fuse location, or ground point is uncertain, stop before energizing the circuit and have the design reviewed by a qualified RV electrical professional.
How Should Heat and Ventilation Be Managed?
Heat is part of the installation environment, not an afterthought. DC-DC chargers and conductors can produce heat during operation, and the surrounding RV may already contain warm engine-bay spaces, enclosed compartments, insulation, or other electrical equipment. A charger that works on a bench may not perform the same way when mounted in a confined location.
Heat management starts with a mounting location that follows the charger’s instructions and allows heat to dissipate. The installer checks nearby heat sources, airflow, cable bundling, enclosure space, and inspection access. After installation, temperature and connections should be checked under an appropriate load. Excessive heat requires diagnosis, not a larger fuse.
Choose the mounting location before routing cable
The mounting area should be secure, dry as required by the equipment, and accessible enough for inspection. It should not expose the charger to avoidable exhaust heat, water intrusion, battery gases, moving components, or rubbing cables. Mounting hardware and clearances should follow the product documentation. Placing the unit in a sealed space without considering heat transfer can shorten equipment life or trigger protective behavior.
Inspect temperature after the system is operating
Commissioning should include a visual and hands-on inspection appropriate to the equipment instructions. Look for loose hardware, damaged insulation, unusual odor, hot terminals, discolored cable jackets, and unexpected charging behavior. If a protective shutdown occurs, do not bypass it. Find the cause, which may involve airflow, current, wiring resistance, battery conditions, or a compatibility issue.
North Texas heat makes this planning especially important for RV owners who travel, store, or boondock in demanding summer conditions. The system should be evaluated in the context of the actual coach, not just an ideal indoor installation.
How Do You Commission the System Before Travel?
Commissioning turns an installed system into a verified system. It should happen before relying on alternator charging during a long trip or remote stay. The objective is to confirm that the charger starts and stops as intended, current follows the design. The house bank receives the expected charging profile, and no component is exposed to abnormal heat.
Before travel, commissioning should verify polarity, cable security, fuse installation, grounding, charger settings, engine-running enable logic, starter-battery isolation, house-bank response, and interaction with solar or shore charging. The installer should document settings and check the circuit under appropriate operating conditions. A system is not ready simply because the engine starts and a display turns on.
Confirm the engine-off and engine-on states
With the engine off, the house bank should not unintentionally drain the starter battery through the charger circuit. With the engine running, the charger should respond according to its enable method and equipment settings. Smart-alternator vehicles may require a specific signal or configuration. The correct result depends on the selected product, so the product documentation controls the test.
Check the interaction with solar and shore charging
Alternator charging is only one source in a modern RV. Solar controllers, shore chargers, inverters, monitors, and battery management systems may all affect the house bank. Settings should not conflict, and the installer should understand how the system behaves when multiple sources operate at the same time. A coordinated approach is especially important for owners building an off-grid system around lithium storage.
Document the finished installation
Keep the charger model, settings, fuse information, cable route, connection points, and inspection notes with the RV records. Documentation makes later troubleshooting safer and helps another technician understand what was installed. It also provides a useful reference if the house bank, solar array, or inverter is expanded in the future.
Frequently Asked Questions
Do I need a DC-DC charger for an RV lithium battery?
Many lithium-equipped RVs benefit from a DC-DC charger because it can regulate alternator charging and limit current. The correct answer depends on the alternator, vehicle wiring, house bank, existing isolation, and battery equipment. A vehicle-specific review is safer than assuming that every lithium conversion needs the same charger or wiring arrangement.
Where should a DC-DC charger be installed?
The charger should be mounted in a location that follows the product instructions and provides suitable protection, heat management, cable access, and service clearance. Avoid unnecessary exposure to exhaust heat, water, abrasion, moving parts, and confined spaces that cannot shed heat. The correct location depends on the RV layout and the selected equipment.
What size wire does a DC-DC charger need?
Wire sizing depends on expected current, cable distance, routing, temperature, conductor type, voltage-drop limits, and the charger’s instructions. There is no safe universal wire size for every RV. Both the source and output circuits should be designed together, with overcurrent protection selected to protect the conductors and equipment.
Can a DC-DC charger work with lithium and solar charging?
Yes, a DC-DC charger can be part of an RV system that also includes lithium batteries and solar charging, provided the components and settings are compatible. The alternator charger, solar controller, shore charger, inverter, and battery management system should be evaluated as one system. Patriots RV Services can help coordinate a Victron-focused solar and lithium integration plan.
How does a DC-DC charger protect the alternator?
A DC-DC charger can limit the current transferred from the vehicle side and regulate the output sent to the house bank. That controlled transfer can reduce the risk of an uncontrolled lithium demand on the alternator. It does not make every vehicle compatible or eliminate the need to inspect alternator capacity, wiring, fusing, heat, and enable logic.
Plan a Safer RV Charging Upgrade
RV DC-DC charger installation is a system-design project involving alternator charging, lithium compatibility, wiring, fusing, grounding, heat, and commissioning. A careful review can help prevent a parts-first installation from creating a new electrical problem. Patriots RV Services serves RV owners in Denton, Krum, and across North Texas with specialized solar, lithium, and electrical upgrade planning.