

Your RV’s air conditioner is pretty good at telling you when something is wrong; you just have to know how to interpret the signs. A unit that blows warm air, a breaker that keeps tripping, or a system that constantly turns on and off are all symptoms of an underlying issue. The key is to not jump to the worst-case scenario. By methodically checking a few key areas, you can often pinpoint the root cause. This guide serves as your diagnostic checklist for Dometic RV air conditioner troubleshooting, helping you understand what those symptoms mean and what you can do about them before deciding if you need professional help.
Key Takeaways
- Always check the basics first: Before assuming a major failure, confirm your power supply is secure, your thermostat settings are correct, and your air filters are clean. These simple steps solve many common AC problems.
- Simple upkeep is key to a healthy AC: Regularly cleaning your air filters and condenser coils is the best way to keep your unit running efficiently. This small effort helps you avoid unexpected breakdowns and costly repairs.
- Know when to call for professional help: For your safety, leave complex electrical work, refrigerant leaks, and capacitor replacements to certified technicians. Recognizing your limits is a key part of responsible RV ownership.
Troubleshooting Common Dometic RV AC Problems
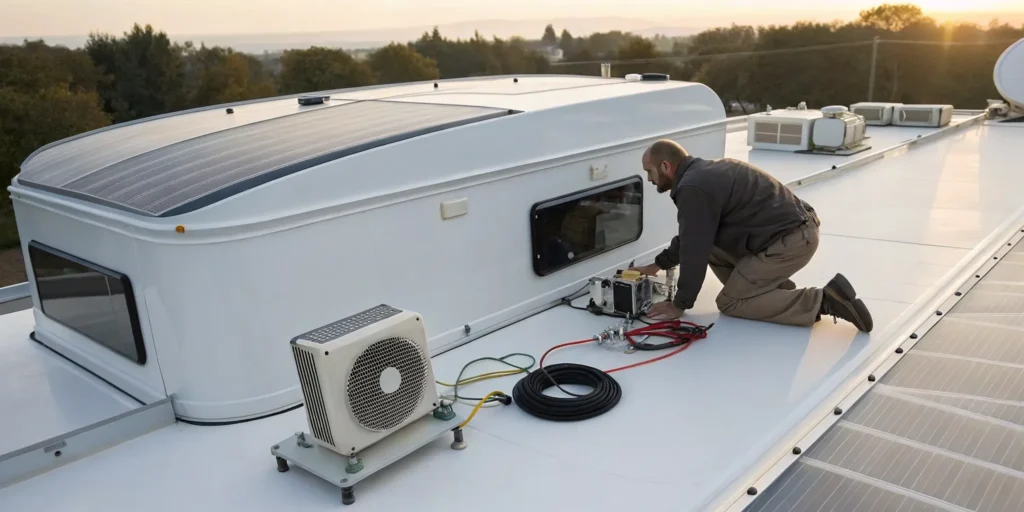
When your RV’s air conditioner starts acting up, especially during a Texas summer, it can quickly turn your comfortable getaway into a stressful situation. The good news is that many common Dometic AC issues have simple explanations you can investigate yourself. Before you assume the worst, a little troubleshooting can go a long way. From a unit that refuses to power on to one that’s blowing warm air, identifying the root cause is the first step toward a solution.
Understanding these frequent problems helps you know what to look for. Sometimes, the fix is as easy as flipping a switch or cleaning a filter. Other times, these initial checks can help you give a technician a clear idea of what’s wrong, saving time and money. Below, we’ll walk through some of the most common complaints with Dometic RV air conditioners and give you actionable steps to diagnose the issue. If you find the problem is more than you can handle, our team is always ready to provide expert RV AC repair services.
Your AC Won’t Turn On
There’s nothing more frustrating than an air conditioner that won’t start at all. When this happens, the problem is almost always related to power. First, confirm your RV is connected to a reliable power source, whether it’s shore power or a generator. Your Dometic unit needs about 110-120V to operate correctly. Take a moment to inspect your power cords for any visible damage or loose connections at the plug and the RV inlet. If you’re using a generator, make sure it’s running properly and has enough fuel. A simple power issue is often the culprit, and checking these basics can get your cool air flowing again without needing a service call.
The Unit Keeps Turning On and Off (Short Cycling)
If your AC runs for a few minutes, shuts off, and then quickly turns back on again, it’s short cycling. This constant starting and stopping is not only inefficient but can also strain the compressor. The issue often points to a problem with the thermostat or low refrigerant levels. Your thermostat might be malfunctioning and sending incorrect signals to the AC unit. You can also check for drafts from windows or vents that might be hitting the thermostat and tricking it into thinking the room is cooler than it is. While you can easily check the thermostat, issues like low refrigerant require professional equipment to diagnose and fix, so it might be time to schedule some RV services and repairs.
It’s Blowing Warm Air
An air conditioner that’s blowing warm air is failing at its one job. Before you panic, check the simplest things first. A dirty or clogged air filter is a very common cause of poor cooling performance. Pop it out and see if it needs a good cleaning or replacement. Next, make sure all your air vents are open and unobstructed. Something as simple as a misplaced bag or pillow could be blocking airflow. If your filters and vents are clear, the problem could be more complex, like dirty condenser coils or low refrigerant. Cleaning the filter is an easy DIY task that can often restore your cool air.
You Hear Strange Noises or Feel Vibrations
Your RV’s AC should produce a consistent, low hum. If you start hearing rattling, buzzing, or loud clicking, it’s a sign that something is wrong. These unusual sounds often mean a part has come loose or debris has found its way into the unit. Before you do anything else, turn off all power to the AC at the circuit breaker. Then, you can safely inspect the unit for loose screws, a wobbly fan blade, or debris like leaves and twigs caught in the fan cage. Tightening loose components or clearing out obstructions can often resolve the noise and prevent further damage to your system.
The Circuit Breaker Keeps Tripping
A circuit breaker that keeps tripping is your RV’s way of telling you there’s an electrical problem. The breaker is a safety device designed to shut off power when it detects an overload or a fault. Your first step is to locate your RV’s breaker panel and reset the switch for the air conditioner. If it trips again immediately or soon after, don’t keep resetting it. This indicates a more serious issue, such as a wiring problem or a failing component within the AC unit itself. Repeatedly tripping a breaker is a clear signal that it’s time to stop troubleshooting and call for professional RV AC repair services to safely diagnose the electrical fault.
AC Won’t Turn On? Check These Things First
There’s nothing worse than flipping the switch for your AC on a hot Texas day and getting… nothing. It’s a frustrating moment, but don’t panic. Often, the problem is something simple you can fix yourself in just a few minutes. Before you assume you need a major repair, walk through these basic checks. This troubleshooting process can save you time and a lot of sweat. We’ll start with the most common culprits, from your power source to your thermostat settings, to help you get that cool air flowing again.
Confirm Your Power Supply
First, let’s make sure your AC unit is getting power. Your air conditioner needs a steady 110-120 volts to operate. Start by checking your RV’s power cord. Is it plugged in securely? Look for any visible signs of damage. If you’re running off a generator, confirm that it’s on and working properly. A loose connection or a faulty power source is a frequent and easily fixable reason for an AC that won’t start.
Review Your Thermostat Settings
Sometimes the fix is so simple it’s easy to overlook. Take a close look at your thermostat. It’s possible the settings were accidentally changed. Make sure the thermostat is set to ‘COOL’ mode, not ‘HEAT’ or ‘FAN.’ You’ll also want to check that the fan is set to ‘AUTO.’ This setting tells the unit to run only when it’s actively cooling. If the settings are correct, try lowering the temperature a few degrees below the current room temperature to see if that kicks the unit on.
Inspect the Circuit Breaker and Fuses
If the power and thermostat seem fine, your next stop is the RV’s electrical panel. Find the circuit breaker for your air conditioner. If it has tripped, the switch will be in the middle or ‘OFF’ position. Flip it completely off and then back on to reset it. While you’re there, check for any blown fuses and replace them if needed. If the breaker trips again right away, it could signal a deeper issue. For persistent electrical problems, it’s always safest to call in the experts for a professional RV AC repair.
Check the Remote’s Batteries
Does your Dometic AC system use a remote control for the thermostat? If so, dead batteries could be the culprit. If your thermostat screen is blank or unresponsive, this is the most likely cause. It’s a quick fix that can save you a lot of headaches. Pop open the back of the remote and replace the batteries with a fresh set. This simple step often brings the whole system back to life instantly. It’s always a good idea to keep a spare set of batteries on hand for this reason.
Why Is Your RV AC Blowing Warm Air?
It’s one of the most frustrating moments on a hot Texas day: you flip on your RV’s air conditioner, expecting a blast of cold air, but get a lukewarm puff instead. Before you panic and start thinking about expensive replacements, take a deep breath. More often than not, an AC blowing warm air is a sign of a relatively simple issue you might be able to fix yourself. From a simple setting mistake to a bit of routine cleaning, a few quick checks can often get that cool air flowing again.
We’ll walk through the most common reasons your Dometic AC might be struggling. These troubleshooting steps start with the easiest fixes and move toward issues that might require a little more attention. By checking these four key areas, you can diagnose the problem and figure out your next move. Whether it’s a five-minute fix or a sign you need professional help, you’ll know exactly what’s going on with your system.
Incorrect Thermostat Settings
Let’s start with the simplest solution because sometimes, it really is that easy. Before you start taking things apart, take a close look at your thermostat. It’s surprisingly common for settings to get bumped or changed accidentally. First, make sure the system is set to “Cool.” If it’s on “Fan Only,” the unit will circulate air without cooling it, which explains the warm breeze. Also, check that the fan setting is on “Auto.” This allows the system to regulate itself properly, turning the fan on and off with the cooling cycle for maximum efficiency. It’s a quick check that could save you a lot of time and trouble.
Dirty or Clogged Air Filters
Your RV’s air filters are the first line of defense against dust, pollen, and road debris. Over time, they get clogged, and when that happens, airflow is restricted. Think of it like trying to breathe through a dusty cloth; the AC unit has to work much harder to pull air through, and the air it does manage to push out won’t be properly cooled. Pop open your AC unit’s cover and inspect the filters. If they look gray and dusty, it’s time for a cleaning or replacement. Making this a part of your regular RV services and repairs checklist will keep your AC running strong all summer.
Low Refrigerant Levels
If your thermostat and filters are in good shape, the problem might be low refrigerant. Refrigerant is the chemical that actually absorbs heat from the air, and without enough of it, your AC can’t do its job. Low refrigerant almost always points to a leak in the system. Unlike changing a filter, this is not a DIY task. Handling refrigerant requires specialized equipment and training to do it safely and correctly. If you suspect a leak, it’s time to call in the experts. Our team can perform a full diagnostic to find the leak and provide a professional RV AC repair to get your system recharged and sealed.
Blocked Condenser Coils
Your AC unit has two sets of coils: evaporator coils inside and condenser coils outside. The condenser coils are responsible for releasing the heat that was pulled from inside your RV. Because they’re exposed to the elements, they can get caked with dirt, leaves, and grime. When the coils are dirty, they can’t release heat effectively, and that trapped heat gets sent right back into your RV. You can often clean the coils yourself with a soft brush and a can of coil cleaner from an RV supply store. Just be gentle, as the metal fins are delicate. Regular cleaning helps maintain your AC’s cooling power.
How to Fix an AC That Keeps Turning On and Off
Is your RV air conditioner playing games with you, turning on for a few minutes and then shutting right back off? This frustrating issue is called short cycling, and it not only ruins your comfort but also puts a lot of strain on your AC components. It happens when the cooling cycle is cut short, preventing your RV from ever reaching the temperature you set on the thermostat.
The good news is that you can often diagnose the cause yourself. Short cycling can be triggered by a few different things, from a simple thermostat glitch to an airflow problem or an electrical issue. Before you assume the worst, let’s walk through some of the most common culprits. By following these steps, you can systematically check for the root cause and, in many cases, get your AC running smoothly again. If you run into trouble, our team is always here to help with expert RV AC repair services.
Reset the Thermostat
Before you start taking things apart, let’s try the simplest fix first: resetting the thermostat. Sometimes, the communication between your thermostat and the AC unit can get scrambled, causing it to behave erratically. A quick reset can often clear up these digital hiccups and restore normal operation.
To do this, turn the thermostat completely off. Wait about five minutes to give it enough time to fully power down and clear any lingering commands. Then, turn it back on and set it to your desired temperature. It sounds almost too easy, but many RV owners have found that this simple action resolves short cycling issues. It’s a zero-cost, five-minute check that could save you a lot of time and trouble.
Inspect and Test the Capacitor
If you hear a humming or buzzing sound when your AC tries to start, but the compressor never fully kicks in, you might have a bad capacitor. The start capacitor is a small but mighty component that gives the motor the electrical jolt it needs to get going. It’s one of the most common parts to fail on an RV air conditioner.
While you can visually inspect the capacitor for bulging or leaking, testing it requires a multimeter and a bit of electrical know-how. Capacitors can hold a dangerous electrical charge even when the power is off, so this is a repair that requires caution. If you’re not comfortable working with electrical components, it’s always best to leave it to the pros. Our technicians can safely test and replace a faulty capacitor for you.
Look for Frost or Drainage Problems
Have you noticed any ice or frost building up on the AC unit’s coils? This is a big red flag. When the evaporator coils get too cold, moisture from the air can freeze on them, creating a block of ice that restricts airflow. When the unit can’t breathe, it can’t cool effectively and will often shut itself down to defrost. This process can cause the short cycling you’re experiencing.
Turn off the AC and let the ice melt completely. While you wait, check your air filters. A dirty, clogged filter is a primary cause of reduced airflow and frozen coils. You should also inspect the drain pan and lines to make sure they aren’t clogged, which can cause water to back up and contribute to freezing.
Verify Your Voltage Supply
Your RV’s air conditioner needs a steady and sufficient supply of power to run correctly. Low voltage, which can be common in crowded RV parks or when using long extension cords, can prevent the compressor from starting or cause it to shut down unexpectedly. This not only leads to short cycling but can also cause long-term damage to the AC motor and other components.
Use a voltmeter to check the power at your pedestal. You should be getting at least 110 volts; anything less can cause problems. Also, inspect your power cord for any signs of damage, like frayed wires or melted plastic around the prongs. If you suspect an electrical issue within your rig, it’s wise to get professional help with your RV services and repairs.
How to Spot and Replace a Bad Capacitor
If your AC unit hums but the fan or compressor won’t kick on, you might have a bad capacitor. The capacitor is a small, cylinder-shaped part that gives the motor the jolt of energy it needs to start. Think of it like a temporary battery. When it fails, the motor can’t get going. The good news is that replacing a capacitor is often a straightforward fix you can handle yourself with a little care and the right tools.
Signs of a Failing Capacitor
The most common sign of a failing capacitor is hearing a humming or buzzing sound from your AC unit without the fan or compressor starting. This happens because the motor is receiving power but lacks the initial “kick” to get moving. You might also notice the AC trying to start, then shutting off after a few seconds. In some cases, you can spot physical signs on the capacitor itself, like a bulging or swollen top, or an oily substance leaking from the casing. Any of these symptoms point to a capacitor that has reached the end of its life. Ignoring it can put extra strain on your AC’s motor, leading to more expensive repairs.
Gather Your Tools and Follow Safety Rules
Before you start, safety is your top priority. Make sure you completely disconnect your RV from all power sources, including shore power and your generator. Turn off the circuit breaker for the air conditioner as an extra precaution. You’ll need a few basic tools: a screwdriver or nut driver to open the AC unit’s cover, a multimeter to test the capacitor, and of course, the correct replacement capacitor. If you’re ever unsure about working with electrical components, it’s always best to call for professional RV AC repair services.
How to Test the Capacitor
Once you’ve accessed the capacitor, you need to safely discharge it, as it can still hold a dangerous electrical charge. With the power off, carefully place the blade of an insulated screwdriver across the metal terminals to discharge any stored energy. You might see a small spark, which is normal. After discharging it, disconnect the wires (take a picture first so you remember where they go) and remove the capacitor. Set your multimeter to the capacitance setting (µF or MFD) and touch the probes to the terminals. If the reading is outside the range printed on the capacitor, it’s time for a replacement.
Your Step-by-Step Replacement Guide
With your new capacitor in hand, the replacement process is simple. First, confirm the power is off. Then, use the photo you took earlier to connect the wires to the correct terminals on the new capacitor. Secure the new capacitor in place with the mounting bracket. Once everything is connected and secure, you can put the AC unit’s cover back on. Finally, restore power to your RV and turn on the circuit breaker. Test your air conditioner to make sure it starts up and blows cold air. Following these steps carefully will get your AC running smoothly again.
How to Troubleshoot Electrical Issues
When your RV’s air conditioner acts up, electrical issues are often the culprit. Before you get started, always prioritize safety. Disconnect your RV from all power sources, including shore power and your generator. Working with electricity can be dangerous, so if you ever feel unsure, it’s best to stop and call for professional RV services and repairs. These checks will help you identify common problems you can fix yourself.
Test Your Voltage
Your Dometic AC needs a steady supply of 110 to 120 volts to run correctly. Low voltage can prevent the compressor from starting or cause the unit to shut down. Start by checking your power source. If you’re plugged into a campground pedestal, inspect the power cord for any visible damage like frays or cracks. If you’re running on a generator, make sure it’s operating smoothly and isn’t overloaded. A poor connection can be the root of the problem. Using a voltmeter will give you a precise reading and confirm if your AC is getting the power it needs.
Check for Loose Wiring
Vibrations from the road can cause wires to come loose over time, interrupting power to your AC. Start at your RV’s main electrical panel and find the circuit breaker for the air conditioner. If it’s tripped, it will be in the “off” position or stuck in the middle. Flip it completely off and then back on to reset it. While you’re there, look for any blown fuses. Another common spot for loose connections is behind the thermostat. Carefully remove the cover and gently check that all wires are securely connected to their terminals. It’s a simple check that can save you a service call.
Diagnose Control Board Problems
Think of the control board as the brain of your AC unit; it tells all the other parts what to do. If you’ve already confirmed your thermostat and capacitors are working, a faulty control board could be the problem. Diagnosing this component can be tricky, as the signs of failure aren’t always obvious. Sometimes a visual inspection might reveal burn marks, but often the damage is internal. If you suspect the control board is the issue, it requires a full replacement. This is a job best left to the experts, so it’s wise to schedule a professional RV AC repair service.
Inspect the Motor and Fan
Sometimes an electrical problem is caused by a mechanical one that puts a strain on the system. With the power completely off, remove the AC shroud on your roof to access the fan and motor. Look for any debris like leaves, twigs, or nests that could be blocking the fan from spinning freely. Give the fan blades a gentle push to see if they move without resistance. If they feel stiff or make a grinding noise, the motor bearings may need lubrication or could be failing. Also, check for any loose bolts that could cause excessive vibration and loosen connections.
Simple Maintenance to Keep Your AC Running Smoothly
A little preventative maintenance goes a long way in keeping your Dometic RV air conditioner running efficiently. You don’t have to be a seasoned technician to handle these simple tasks. By spending a little time on basic upkeep, you can prevent common problems, extend the life of your unit, and ensure you have reliable cool air on your adventures. Think of it as a small investment to avoid a major headache down the road.
Regular cleaning and inspections are your first line of defense against AC failure. Dust, debris, and general wear can reduce your unit’s performance, forcing it to work harder and consume more power. These simple DIY checks can help you catch small issues before they turn into costly repairs. If you ever feel like a task is beyond your comfort level, remember that our team is always here to help with professional RV services and repairs. Let’s walk through a few key maintenance steps you can perform to keep your AC in top shape.
Clean or Replace the Air Filter
One of the easiest and most effective things you can do for your AC is to regularly clean or replace its air filter. A dirty filter is like trying to breathe through a stuffy nose; it restricts airflow, forcing your AC unit to work much harder to cool your RV. This not only reduces its cooling power but can also lead to bigger problems, like a frozen evaporator coil. Check your filter monthly, especially during peak season. Most are easy to access from inside your RV. You can simply slide it out, wash it with soap and water if it’s reusable, or swap it for a new one. This simple step ensures your AC breathes easy and keeps you cool.
Maintain the Condenser Coils
Your AC’s condenser coils, located in the rooftop unit, are essential for releasing heat from your RV. Over time, they can get covered in dirt, dust, and road grime, which traps heat and makes your AC less efficient. To clean them, first make sure all power to the unit is turned off. Then, you can gently use a soft brush or a commercially available coil cleaner to remove the buildup. Be careful not to bend the delicate metal fins. Keeping these coils clean is a key part of routine RV AC repair and maintenance that helps your system cool effectively, even on the hottest Texas days.
Clean the Drain Pan and Lines
Your air conditioner naturally creates condensation as it cools the air, and this water needs a place to go. It collects in a drain pan and flows out through a drain line. If this line gets clogged with mold, mildew, or debris, water can back up and leak into your RV’s ceiling or walls, causing serious damage. To prevent this, periodically check your drain pan and lines. You can use a pipe cleaner or a blast of compressed air to clear any blockages and ensure water can flow freely. This quick check can save you from needing a major RV roof repair later on.
Inspect Your Ductwork
For your AC to cool your entire RV effectively, the air needs a clear path to travel through the ductwork. Take a moment to inspect your air vents to make sure they are all open and not blocked by furniture, bags, or other items. If you can access any part of your ductwork, check for any kinks, holes, or sections that may have come loose. A crushed or disconnected duct can severely restrict airflow to certain parts of your RV, leading to uneven cooling and making your AC unit work overtime. Ensuring your ducts are clear and intact helps your system distribute cool air efficiently.
How to Prevent Future AC Problems
A little bit of preventative maintenance can save you a lot of headaches (and sweat) down the road. Staying on top of a few simple tasks will keep your Dometic AC running efficiently, extend its lifespan, and help you avoid those unexpected breakdowns in the middle of a summer road trip. Think of it as a small investment of your time that pays off with cool, comfortable air whenever you need it. These routine checks are easy enough for any RV owner to handle and will make a huge difference in your unit’s performance and reliability. By being proactive, you can catch small issues before they turn into major, expensive repairs. Let’s walk through the key maintenance steps that should be on every RVer’s calendar.
Check Filters Monthly
One of the easiest and most effective things you can do for your AC is to “clean air filters every 30 days.” Your AC unit is constantly pulling in air from inside your RV, and that air carries dust, pet dander, and other particles. The filter’s job is to catch all that gunk before it gets into the sensitive parts of your AC system. When the filter gets clogged, it forces the unit to work much harder to pull air through, which reduces its cooling power and can strain the motor. A quick check once a month is all it takes. If it looks dirty, you can often just rinse it clean. Make it a habit to “clean or replace air filters often” to ensure you always have strong, cool airflow.
Clean Condenser Coils Annually
Your AC’s condenser coils are located in the outside unit, and their job is to release the heat that’s been pulled from inside your RV. Over time, these coils can get covered in dirt, leaves, and road grime, which makes it harder for them to do their job. When the coils are dirty, your AC can’t cool as efficiently. That’s why it’s a great idea to “inspect and clean the evaporator and condenser coils to help your AC cool better” at least once a year. For a simple clean, you can “gently hose down the outside of the AC unit to remove dirt and leaves.” If you notice they’re particularly grimy, a more thorough cleaning might be needed as part of your annual RV services and repairs.
Store and Cover Your RV Correctly
How you store your RV during the off-season can have a big impact on your AC unit. Leaving it exposed to the elements allows dirt, leaves, and moisture to build up, which can lead to corrosion and blockages. A simple but effective step is to “keep the unit covered during long-term storage to prevent debris buildup.” A dedicated AC cover is an inexpensive investment that protects your unit from rain, snow, and sun damage. This is especially important when you’re getting your rig ready for the colder months. Proper storage is a key part of the winter readiness service that protects all your RV’s systems, including the air conditioner.
Inspect Seals and Gaskets
The seal, or gasket, between your AC unit and the roof of your RV is your first line of defense against water leaks and air drafts. Over time, this seal can dry out, crack, or become compressed, creating gaps. You should “regularly check the gasket or seal around your AC unit on the roof for damage and tighten mounting bolts” to ensure it’s secure. If you see any signs of wear, it’s crucial to act fast. You’ll need to “replace a damaged seal and use a weatherproof sealant around the edges” to create a new, watertight barrier. A failing seal not only lets warm air in and cool air out but can also lead to serious water damage, making it a critical part of your RV roof repair checklist.
When to Call Patriots RV Services for Professional Help
Tackling a DIY project can be incredibly satisfying, but there are times when it’s smarter and safer to call in a professional. While many common Dometic AC issues can be solved with a little troubleshooting, some problems require specialized tools, training, and a deep understanding of how these complex systems work. If you find yourself feeling overwhelmed, unsure, or dealing with a potentially hazardous situation, don’t hesitate to put down the tools. Recognizing when a job is beyond your scope is a key part of responsible RV ownership. That’s when our team at Patriots RV Services is ready to step in and get the job done right.
You’re Facing Complex Electrical Repairs
When it comes to your RV’s electrical system, it’s always better to be safe than sorry. If you’ve checked the basics like your power supply and breakers but the AC still won’t cooperate, you might be looking at a more complicated issue. Problems with the control board, motor, or internal wiring are not something you should try to fix on your own without proper training. A wrong move could lead to a nasty shock or cause even more damage to your unit. As one expert guide puts it, “Don’t try to fix complex electrical problems yourself.” If you see frayed wires or suspect a control board failure, it’s time to call for professional RV AC repair services.
You Suspect Refrigerant System Issues
Your RV’s air conditioner relies on a closed refrigerant system to cool the air, and this system is best left to the experts. If your unit is blowing warm air and you’ve already cleaned the filters and coils, you might be low on refrigerant. This usually points to a leak somewhere in the system. Handling refrigerant requires EPA certification and specialized equipment to safely find the leak, repair it, and recharge the system. Trying to do this yourself is not only illegal in many cases but can also be harmful. If you notice a hissing sound or an oily residue near the AC lines, it’s a clear sign to call a professional to check for leaks and handle the refill.
You Have Warranty Questions
Before you start taking apart your Dometic AC unit, take a moment to check your warranty. Many new RVs and AC units come with a manufacturer’s warranty that covers parts and labor for specific repairs. Attempting a DIY fix on a covered component could accidentally void that warranty, leaving you responsible for the full cost of a professional repair later on. If you’re not completely comfortable performing a repair, it’s always best to take it to a certified service shop. Our team can perform authorized RV services and repairs that keep your warranty intact, and we can even help you manage the claims process.
You Have Safety Concerns
Your personal safety is always the top priority. RV air conditioners have components that can be dangerous even when the power is disconnected. For instance, capacitors can store a powerful electrical charge long after the unit is turned off and can give you a serious shock if not handled correctly. Beyond electrical risks, working on your RV’s roof can be precarious, and some internal parts have sharp edges. If at any point you feel uneasy or unsure about a step, that’s your cue to stop. There’s no shame in calling for help. Our technicians are trained to handle these repairs safely, so you can have peace of mind knowing the job is done without risk.
Related Articles
- Reliable RV AC Repair Services in Dallas, TX | Patriots RV Services
- RV Roof Maintenance and Repair | Patriots RV Services
- How to Repair RV Roof: A Complete Guide for RV Owners – Patriots RV Services
- How to Repair RV Roof Leak: Quick and Easy Solutions – Patriots RV Services
- How Do You Replace an RV Roof Vent? – Patriots RV Services
Frequently Asked Questions
What are the first things I should check if my AC won’t start at all? Before you worry, start with the power source. Make sure your RV is securely plugged in and that the campground pedestal or your generator is working correctly. After that, take a look at your thermostat to confirm it’s set to “Cool” and the temperature is set low enough to trigger the unit. Your final simple check is the circuit breaker; a quick flip of a tripped switch can often solve the problem instantly.
My AC is running, but it’s not cold. What are the most common causes? When your AC is blowing warm air, the most frequent culprit is a dirty air filter. A clogged filter restricts airflow and seriously hurts the unit’s ability to cool. Another common issue is dirty condenser coils on your roof unit, which can’t release heat effectively if they’re covered in grime. If both of those are clean, you might be low on refrigerant, which points to a leak that requires professional service.
Why does my AC turn on and off so frequently? This is called short cycling, and it often points to an airflow or thermostat issue. A clogged air filter can cause the unit to overheat and shut down, while a misplaced thermostat (like one in direct sunlight or near a vent) can get false readings. It can also be a sign of an electrical problem, like low voltage from the power source, which prevents the compressor from running a full cycle.
How often should I clean my AC filters and coils? For best performance, you should check your air filters at least once a month, especially if you’re using your RV frequently or travel with pets. Clean or replace them as soon as they look dirty. The condenser coils on the roof should be inspected and cleaned at least once a year. Making this part of your spring prep routine is a great way to ensure your AC is ready for the summer heat.
I’ve tried all the simple fixes. When is it time to call a professional? You should call for professional help anytime you feel unsafe or out of your depth. Specifically, if you suspect a refrigerant leak, are dealing with complex electrical issues like a faulty control board, or need to replace a component like a capacitor and aren’t comfortable with the process, it’s time to call an expert. A professional can handle these jobs safely and correctly, preventing further damage to your system.