

Putting your RV into storage for the winter should bring peace of mind, not a nagging sense of worry. Will the pipes freeze? Will pests move in? A proper winterization process answers all those questions, allowing you to rest easy knowing your home-on-wheels is safe and secure. It’s more than just adding some antifreeze; it’s a comprehensive checklist that protects your plumbing, battery, tires, and interior from the damage cold weather and inactivity can cause. Following a clear guide on how to winterize a motorhome is the key to a stress-free off-season and a trouble-free start to your next adventure.
Key Takeaways
- Prevent Costly Freeze Damage to Your Plumbing: The most important reason to winterize is to stop water from freezing and expanding inside your pipes, which can cause them to burst. This kind of damage is often not covered by insurance, so a little prevention saves you from a massive out-of-pocket expense.
- Drain Completely Before Adding Antifreeze: A proper winterization has two main parts: first, drain every drop of water from your tanks and lines. Second, circulate a non-toxic, RV-specific antifreeze through the plumbing to protect any remaining moisture from freezing.
- Look Beyond the Pipes for Full Protection: A complete winter prep also includes caring for your motorhome’s other systems. Properly store your battery to keep its charge, protect your tires from flat spots, and inspect all exterior seals to keep moisture and pests out.
Why You Need to Winterize Your Motorhome
As the camping season winds down, it’s tempting to park your motorhome, lock the door, and call it a day. But before you do, there’s one crucial task you can’t afford to skip: winterizing. Think of it as tucking your RV in for a long winter’s nap. It’s a series of steps you take to protect your vehicle’s sensitive systems from the harsh effects of freezing temperatures.
The main goal is to safeguard your motorhome’s water system. Any water left in the pipes, tanks, or water heater can freeze, expand, and cause serious problems. Properly preparing your RV for the cold is the single best thing you can do to prevent expensive, frustrating issues when you’re ready to hit the road again in the spring. It’s a fundamental part of responsible RV ownership that protects your investment and gives you peace of mind all winter long.
Prevent Costly Freeze Damage
The science is simple: when water freezes, it expands. This expansion puts incredible pressure on whatever is containing it. In your motorhome, that means your entire plumbing system is at risk. Plastic and copper pipes, fittings, and even your water heater tank can crack or burst under the strain. This kind of damage isn’t just a small leak; it can lead to a complete system failure.
What’s worse is that most RV insurance policies consider freeze damage to be a maintenance issue, meaning they likely won’t cover the repair costs. A professional winter readiness service is a small investment that prevents a massive, out-of-pocket expense come springtime.
What Happens If You Skip Winterization?
Forgetting to winterize your motorhome can lead to a cascade of problems. The most immediate issue is burst pipes and cracked tanks, but the damage doesn’t stop there. Your water pump, faucets, and toilet can all be ruined by freezing water. When the ice thaws, you’re left with major leaks.
This water damage can then seep into your RV’s subflooring, walls, and insulation, creating the perfect environment for mold and rot. What started as a plumbing problem can quickly turn into a structural one. Taking the time to properly winterize ensures that when warmer weather returns, you can focus on planning your next adventure instead of dealing with complex RV services and repairs.
Gather Your Winterizing Supplies
Before you start draining tanks and flushing lines, it’s a good idea to gather all your tools and supplies in one place. A little preparation makes the whole process go much smoother and helps you avoid any last-minute trips to the store. Having the right gear on hand is the first step to protecting your motorhome from the cold, ensuring it’s ready for your first spring adventure.
RV-Safe vs. Standard Antifreeze
This is one of the most important distinctions to make when winterizing. You must use an RV-specific, non-toxic antifreeze. This pink-colored liquid is designed to be safe for your plumbing, including the pipes that carry your drinking water. Standard automotive antifreeze, which is typically green or orange, is highly toxic and should never be introduced into your RV’s fresh water system. Using the wrong kind can contaminate your plumbing and pose a serious health risk, so always double-check that you’ve got the RV/Marine-grade bottle.
Essential Tools and Equipment
Your winterizing toolkit doesn’t need to be complicated, but a few key items are essential for doing the job correctly. Think of this as your pre-winterization checklist.
Here’s what you’ll likely need:
- Several gallons of RV/Marine-grade antifreeze
- A water heater bypass kit (if not already installed)
- An air compressor and a blowout plug to clear water from the lines
- A socket wrench set to remove drain plugs
- Basic hand tools like screwdrivers
- Buckets and old towels for catching water and cleaning up spills
If gathering these supplies feels like a project in itself, you can always count on our team. We offer a complete winter readiness service to handle the entire process for you.
How to Drain Your Motorhome’s Water Systems
Before you even think about adding antifreeze, the first and most important step is to get all the water out of your RV’s plumbing. Any water left behind can freeze, expand, and crack your pipes, tanks, and fixtures, leading to some seriously expensive problems come spring. Taking the time to drain everything properly is your best defense against the cold.
Think of it as giving your motorhome a clean slate for its winter hibernation. This process isn’t difficult, but it does require a bit of patience to make sure you’re thorough. We’ll walk through how to drain each part of your water system, from the fresh water tank to the water heater. If you follow these steps, you’ll be well on your way to a worry-free winter. And if you ever run into issues or feel unsure, remember that professional RV services and repairs are always an option to ensure the job is done right.
Drain the Fresh Water Tank and Lines
Your first target is the fresh water system. Start by locating and opening all the low-point drains on your motorhome. You’ll typically find three: one for the fresh water tank, one for the hot water lines, and one for the cold water lines. Letting these open will drain the bulk of the water.
Next, go inside your RV and open every single faucet, from the kitchen sink to the bathroom shower. Don’t forget to flush the toilet until no more water comes out. This allows air to enter the system, which helps push out any remaining water trapped in the lines. It’s a simple but crucial step for a complete drain.
Empty the Gray and Black Water Tanks
Once the fresh water is out, it’s time to deal with the holding tanks. Take your motorhome to an approved dump station to empty both the gray and black water tanks. It’s important to dump and flush these tanks thoroughly, maybe even a few times, to make sure they are completely clear. Any waste left behind can freeze and cause blockages or damage to your sensors. If your RV has a built-in black tank flush port, now is the perfect time to use it for a deep clean.
Clear the Water Heater and Pump
Your water heater needs special attention. First, make sure it’s turned off and completely cool to prevent any accidents. Once it’s safe, locate the drain plug or anode rod on the outside of the unit and remove it. All the water will drain out. If you notice rusty water or sediment, it’s a good idea to flush the tank.
Finally, you’ll want to bypass the water heater. This prevents it from filling up with antifreeze in the next stage, which saves you several gallons of antifreeze and a lot of time flushing it out in the spring. Simply turn the valves on the back of the unit to close off the cold water inlet and hot water outlet. If you’d rather leave this to the pros, our winter readiness service can handle it for you.
A Step-by-Step Guide to Adding Antifreeze
With your motorhome’s water systems completely drained, it’s time to introduce RV-safe antifreeze. This is the most important step in protecting your plumbing from the inside out. The antifreeze displaces any leftover water droplets, preventing them from freezing, expanding, and cracking your pipes. This process is methodical, but it’s not complicated. Just follow these steps carefully to ensure every line and fixture is protected. If you’re short on time or want the peace of mind that comes with a professional touch, our winter readiness service is always an option. We’ll handle the entire process for you, so you can rest easy knowing your RV is secure all winter long.
Bypass the Water Heater
Before you start pumping antifreeze, you need to bypass your water heater. Why? Your water heater tank can hold anywhere from six to ten gallons of water. Filling it with antifreeze is unnecessary and a waste of money. Bypassing it ensures the antifreeze only goes where it’s needed: into your plumbing lines.
First, make sure the water heater is turned off and completely cool. Never drain a hot or pressurized tank. Next, locate the bypass valve, typically found near the tank itself. Turn the valve to the “bypass” position. Finally, head outside and remove the water heater’s drain plug or anode rod to let any remaining water trickle out. This is also a great time to inspect your anode rod for corrosion and see if it needs replacing.
Circulate Antifreeze Through Faucets and Fixtures
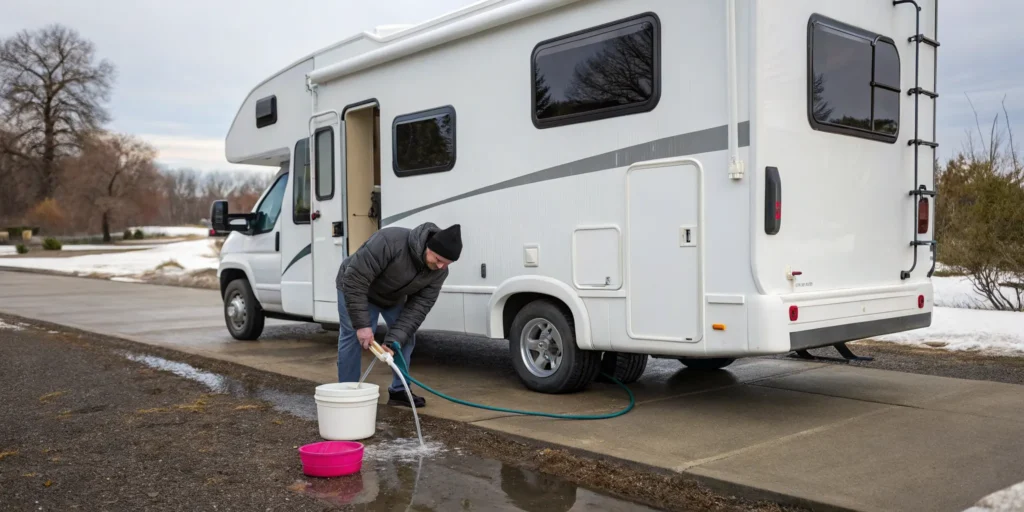
Now it’s time to get that pink antifreeze flowing. You’ll use your RV’s water pump to draw the antifreeze directly from the jug into the plumbing. Connect the siphon tube to your water pump’s inlet valve, place the other end in your jug of antifreeze, and turn on the pump.
Start with the faucet closest to the pump. Open the cold water tap and let it run until you see a steady stream of pink antifreeze. Then, close it and open the hot water tap until the same thing happens. Repeat this process for every single faucet in your motorhome, including the kitchen sink, bathroom sink, and both the indoor and outdoor showers. Don’t forget any appliances connected to the water lines, like an ice maker or washing machine.
Protect the Toilet and Shower Drains
You’re almost done. The last step is to protect your drains and toilet. Even after draining your tanks, a small amount of water can remain in the P-traps under your sinks and shower. This water can freeze and crack the drain pipes. To prevent this, pour about a cup of antifreeze directly down each drain.
Next, move to the toilet. Press the flush pedal just long enough for the antifreeze to run through the valve and into the bowl. This protects the toilet’s seals and ensures no water is left in the mechanism. Taking care of these final details ensures every part of your plumbing system is safe from freeze damage. If you run into any unexpected leaks or issues during this process, our team is here to help with all RV services and repairs.
Protect Your RV’s Interior and Exterior
Once you’ve handled the plumbing, your next focus is protecting the shell of your motorhome. Winter weather, moisture, and pests can cause serious damage to your RV’s structure and interior if you’re not careful. Taking a few extra steps to seal, clean, and inspect your rig will prevent costly surprises when you pull it out of storage in the spring. Think of it as tucking your home-on-wheels in for a long winter’s nap, making sure it’s safe, sound, and secure from the elements.
Care for Slide-Outs and Seals
Your RV’s slide-outs are convenient, but they can also be weak points for letting in cold air, moisture, and pests. Before storing your motorhome, carefully inspect the rubber seals around each slide-out for any signs of cracking, tearing, or brittleness. A well-maintained seal is your first line of defense. It’s also a good idea to check for any small gaps or cracks on the interior and exterior walls where critters could sneak in. A can of spray foam sealant can be a great tool for closing up any suspicious openings, ensuring your RV stays cozy and pest-free all winter. If your slides are consistently giving you trouble, it might be time to look into an upgrade like a Vroom Slide System.
Inspect the Roof and Seals
Your RV’s roof is its most important shield against rain, snow, and ice. A small leak can lead to huge problems like water damage, rot, and mold. Before winter arrives, get up on the roof and do a thorough inspection. Look closely at the sealant around vents, skylights, and the edges of the roof. If you see any cracks or gaps, clean the area and apply a fresh layer of RV-specific lap sealant. Don’t forget to check the seals around your windows and doors, too. If you find any damage or are concerned about the integrity of your roof, scheduling a professional RV roof repair service can provide peace of mind and prevent expensive damage down the road.
Clean the Interior and Control Moisture
Putting your RV away clean is one of the best ways to ensure it smells fresh in the spring. Crumbs and spills attract pests and can lead to mold growth. Give the interior a deep clean, making sure to vacuum carpets, wipe down all surfaces, and empty all cabinets. To combat moisture, which can cause musty odors and mildew, prop open your refrigerator and freezer doors after cleaning them. You can also leave cabinet and closet doors ajar to encourage air circulation. If you’re storing your RV in a humid area and have access to power, running a small dehumidifier can make a world of difference. A thorough RV washing and detailing session is a great way to start the process.
Keep Pests Out
An empty RV can look like a perfect winter home for mice and other pests. Your main goal is to make it as uninviting as possible. The first step is to remove every last bit of food, including canned goods, spices, and anything in the pantry. Pests have a powerful sense of smell. After removing all food, clean the kitchen area thoroughly, including the oven, microwave, and refrigerator, to eliminate any lingering crumbs or scents. Many RV owners swear by placing bars of strongly scented soap, like Irish Spring, or cotton balls with peppermint oil around the interior to deter rodents. If you do find evidence of an infestation, you may need professional RV services and repairs to fix any damage they’ve caused.
Don’t Forget the Battery, Tires, and Chassis
After you’ve handled the plumbing, it’s tempting to call it a day. But winterizing your motorhome goes beyond the water systems. The parts of your RV that handle power, movement, and fuel also need protection from the cold. Taking care of your battery, tires, and chassis prevents frustrating and expensive problems when you’re ready to hit the road in the spring. A dead battery, cracked tires, or a corroded propane system can stop your first trip in its tracks.
Think of this as a complete vehicle check-up before its long winter nap. These components are just as vulnerable to freezing temperatures, moisture, and long periods of inactivity as your water pipes are. A little extra effort now saves you from bigger headaches later. If you run into any issues or feel unsure about these steps, remember that professional RV services and repairs can give you peace of mind knowing everything is handled correctly. Let’s walk through how to protect these essential systems.
Store Your Battery Properly
Your RV’s battery can lose its charge and even freeze during the winter, which can cause permanent damage. The best way to prevent this is to remove it completely. Start by disconnecting the negative terminal first, then the positive. Carefully lift the battery out and find a safe storage spot for it. You’ll want to keep it in a cool, dry place off the concrete floor, like a garage shelf or basement. Make sure to give it a full charge before storing it and check on it periodically throughout the winter, topping it off if needed. This ensures you have a reliable power source ready for your first adventure of the season.
Protect Your Tires from the Elements
When your motorhome sits in one spot for months, the tires can develop flat spots from the constant pressure. To avoid this, clean your tires and inflate them to the recommended pressure, or even slightly higher as some guides suggest. This helps them maintain their shape. It’s also a great idea to cover your tires to shield them from sun, moisture, and temperature swings, which can cause the rubber to crack over time. Taking care of your tires is a key part of maintaining your rig’s foundation, which includes the entire RV diesel chassis system.
Secure the Propane System
Your propane system also needs to be secured for the winter. Start by closing the valve on your propane tanks completely. This is an important safety step that prevents any potential leaks while the RV is in storage. If your tanks are removable, you can store them in a secure, upright position away from the motorhome. For extra protection, you can cover the regulator to keep ice and moisture out. A simple plastic bag secured with a zip tie works perfectly. This small step helps ensure your propane system will be in good working order when you need it for cooking and heating next year.
Common Winterization Mistakes to Avoid
Winterizing your motorhome is a detailed process, and a few small oversights can lead to big, expensive problems come spring. We’ve seen it all, and trust me, a little extra care now saves a world of frustration later. Think of it as tucking your RV in for a long winter’s nap; you want to make sure it’s safe, sound, and ready for your next adventure. The goal is to protect your investment from the harsh effects of freezing temperatures, moisture, and pests.
Many RV owners feel confident tackling this task themselves, which is fantastic. However, a simple mistake, like leaving a little water in a pipe or using the wrong fluid, can result in cracked lines, a damaged water heater, or worse. These are often the kinds of repairs that aren’t covered by standard insurance policies, leaving you with a hefty bill before you can even think about hitting the road. To help you get it right, we’re going to walk through some of the most common mistakes we see. By learning what not to do, you can create a solid winterizing routine that protects your motorhome year after year. Getting these details right is the key to a stress-free de-winterizing process when the weather warms up.
Not Draining the Water System Completely
This is probably the most critical mistake you can make. When water freezes, it expands, and that expansion is powerful enough to burst pipes and crack fittings. Even a small amount of water left in the system can cause thousands of dollars in damage. To make sure you get every last drop, open all your low-point drains, which usually include one for cold water, one for hot water, and one for the fresh water tank. Then, go inside and open every faucet, turn on the shower, and flush the toilet. This helps push any remaining water out of the lines. If you’re ever unsure if you’ve done it correctly, our team can handle all your RV services and repairs to give you complete peace of mind.
Using the Wrong Kind of Antifreeze
All antifreeze is not created equal, and this is one area where you can’t cut corners. You must use a non-toxic antifreeze specifically labeled for RV and marine plumbing systems. Regular automotive antifreeze is highly toxic and can contaminate your fresh water system, posing serious health risks. Don’t even let it near your RV’s plumbing. Always check your owner’s manual for any specific recommendations for your model. Using the right product ensures your pipes are protected from freezing without compromising the safety of your drinking water. If you’re feeling overwhelmed by the different types, our winter readiness service takes all the guesswork out of the process for you.
Overlooking Key Appliances
Your RV’s plumbing is more than just sinks and a toilet. Many modern motorhomes have appliances that are connected to the water system, and they’re easy to forget. If you have a washing machine, an ice maker in your freezer, or a dishwasher, you need to winterize them too. Each one has its own specific procedure, so pull out their manuals and follow the steps carefully. Don’t forget to pour some RV antifreeze down your drains and into the black and grey water tanks. This protects the dump valves and seals from freezing and cracking, which is a messy problem you definitely don’t want to deal with in the spring.
Getting Your Motorhome Ready for Spring
After a long winter, the first signs of spring mean it’s almost time to hit the road again. But before you plan your first trip, you need to wake your motorhome from its winter slumber. De-winterizing is the process of reversing the steps you took to protect your RV, ensuring everything is clean, safe, and ready for adventure. It involves flushing the plumbing, checking all your systems, and giving your rig a thorough inspection.
Taking the time to de-winterize properly helps you catch any potential issues that may have developed during storage, like a leaky seal or a dead battery. It’s a crucial step for a smooth and trouble-free travel season. Think of it as a spring check-up for your home on wheels. By following a clear process, you can confidently prepare your motorhome for all the miles ahead. If you run into any issues or just want a professional to handle it, our team is always here to help with expert RV services and repairs.
Your De-Winterizing Checklist
Start by tackling the basics to get your motorhome ready for the season. First, reinstall your battery if you removed it for storage, making sure the connections are clean and secure. Next, check your tires. Inspect them for any cracks or signs of wear, and inflate them to the manufacturer’s recommended pressure.
Inside, open up all the windows and vents to air out the space. Do a thorough check for any signs of pests that might have made a home over the winter. Finally, bring back any items you removed for storage, like cushions, bedding, and kitchen supplies. This initial once-over sets the stage for checking your RV’s more complex systems.
Test and Inspect All Systems
With the power back on, it’s time to test all your motorhome’s systems. Turn on all interior and exterior lights and check your appliances, including the microwave, refrigerator, and stove. Test your propane system for leaks by applying soapy water to the connections and looking for bubbles.
Next, inspect all the seals around your windows, doors, and slide-outs. Winter weather can cause seals to crack or shrink, leading to potential leaks. If you notice any damage, it’s important to get it repaired to prevent water intrusion. A careful inspection now can save you from dealing with bigger problems down the road, especially when it comes to your roof. If you spot any trouble spots, it’s wise to schedule a professional RV roof repair.
Flush the Antifreeze from Your Plumbing
Getting the antifreeze out of your plumbing is one of the most important de-winterizing steps. Start by connecting your RV to a fresh water source. If you bypassed your water heater for the winter, make sure the bypass is turned off and the drain plug is reinstalled.
Turn on your RV’s water pump and open all the faucets, both hot and cold, starting with the one closest to the pump. Let the water run until it flows clear and you no longer see any pink antifreeze. Don’t forget to flush the toilet and run water through the shower as well. Once the lines are clear, you can sanitize your fresh water system to ensure it’s clean and safe for use.
Related Articles
- RV Winterizing Service: Winter Readiness – Patriots RV Services
- How to Seal RV Roof: Quick Tips for Easy DIY Maintenance – Patriots RV Services
- How to Protect RV Roof and Extend Its Lifespan – Patriots RV Services
- RV washing and detailing. – Patriots RV Services
- How Long Does an RV Battery Last: Key Insights and Maintenance Tips – Patriots RV Services
Frequently Asked Questions
Do I really need to winterize my motorhome if I live in a place with mild winters, like Texas? Yes, it’s still a very smart move. Even in areas with milder climates, temperatures can unexpectedly drop below freezing. It only takes one hard freeze to crack a pipe or damage your water heater. Think of winterizing as an inexpensive insurance policy against a surprise cold snap that could lead to costly and frustrating repairs.
Can I just blow out the water lines with air instead of using antifreeze? While using an air compressor to blow out the lines is a popular method, it can be difficult to remove every last drop of water. Low points in your plumbing can easily trap enough water to freeze and cause a crack. Using RV-safe antifreeze is a more reliable approach because it actively displaces any remaining water, giving you confidence that the entire system is protected.
How much RV-safe antifreeze should I buy? The amount you need will depend on the size and complexity of your motorhome’s plumbing system. As a general guideline, it’s a good idea to start with two to three gallons. It is always better to have a little extra on hand than to run out halfway through the job. Remember that if you have appliances like a washing machine or an ice maker, you will likely need more.
I forgot to bypass my water heater before adding antifreeze. What should I do? This is a common mistake, so don’t worry. The main problem is that you’ve used several extra gallons of antifreeze to fill the tank, which will need to be flushed out completely in the spring. When you de-winterize, you will have to drain the water heater and then flush it with fresh water repeatedly until you are certain all the antifreeze is gone.
Besides the plumbing, what’s one thing people often forget when winterizing? It’s very easy to focus so much on the water systems that you overlook pest prevention. One of the most important steps is to remove every single food item from your RV, including spices, canned goods, and stray crumbs in the cabinets. A thorough cleaning of the kitchen and pantry eliminates the scents that attract rodents and other pests, saving you from discovering chewed wires or other damage in the spring.
Need Professional RV Service in Denton, TX?
Call (940) 488-5047 — Patriots RV Services, your mission-critical RV service center in Denton, TX.