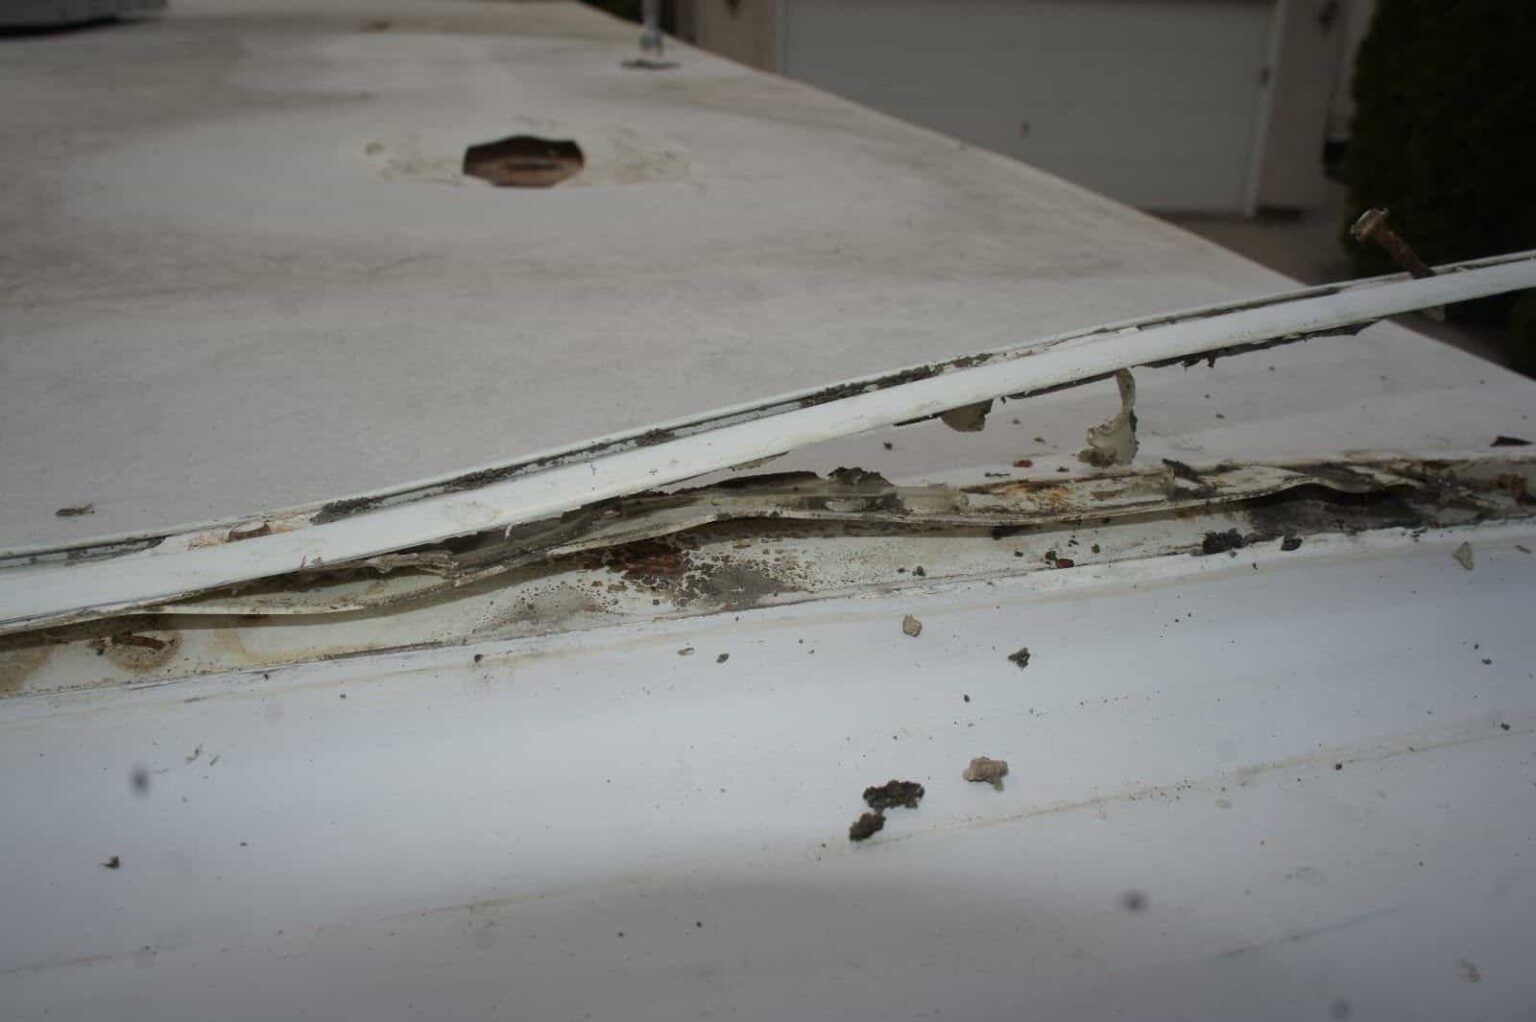
How to Repair Water Damaged RV Roofs: Tips and Tricks

Start by checking your roof for damage—look at the seams, edges, and use a moisture meter to find hidden problems. When you’re ready to make repairs, pick quality materials like fiberglass or EPDM rubber roofing that your trusted RV service center would recommend. Make sure the roof surface is completely clean, patch up any cracks you find, and clear away all debris before you start. Spread a good sealant evenly across the damaged spots, but don’t stop there—do a complete repair job rather than just covering up the problem. Keep your roof in good shape by checking it regularly, giving it a thorough cleaning twice a year, and inspecting the sealants for wear. You can avoid future headaches by cutting back tree branches that hang over your RV and keeping it covered when you’re not using it. Following these steps will get your water-damaged RV roof back in solid condition, especially when paired with a reliable RV service.
Assessing the Damage
First, we thoroughly examine the RV roof for any signs of water damage, such as soft areas, discoloration, or bubbles in the material. Careful inspection is essential to accurately assess the extent of the damage. We pay close attention to seams, edges, and around any openings like vents, antennas, or slide tops, as these are common trouble spots. Using a moisture meter can help identify hidden problem areas that are not immediately visible. Moreover, checking the interior ceiling for water stains or mold growth can provide further insight into the severity of the damage. By conducting a detailed evaluation, we can determine the scope of repairs needed and develop a strategic plan for effective RV roof water damage repair.
Choosing the Right Materials
When selecting materials for repairing water-damaged RV roofs, our main focus is on durability, weather-resistance, and compatibility with the existing roof structure. Fiberglass is a popular choice due to its strength and ability to withstand various weather conditions. EPDM rubber roofing is another excellent option known for its durability and easy installation process. For metal roofs, aluminum coating can provide a protective layer that is resistant to corrosion and UV exposure. Sealants and adhesives should be chosen carefully to confirm they are compatible with the roof material and provide a strong bond. Prioritize quality materials that offer longevity and reliability to effectively restore your RV roof to its former glory.
Preparing the Roof Surface
To properly prepare the roof surface for repairing water-damaged RV roofs, we must first make sure that all debris, dirt, and previous coatings are thoroughly removed to create a clean and smooth foundation for the repair work. Begin by sweeping the roof to eliminate loose debris, then use a pressure washer or scrub brush with a mild detergent to clean the surface. Make sure all areas are dry before proceeding. Next, inspect for any signs of damage such as cracks or holes and address them accordingly. Sand down rough areas and remove any loose material. Finally, double-check that the entire surface is free of contaminants that could hinder proper adhesion of the sealant or repair material.
Applying Sealant and Repairing
For effective repair of water-damaged RV roofs, we must meticulously apply sealant and address any areas needing repair with precision and care. When it comes to applying sealant and repairing, here are key steps to follow:
– Clean the Area Thoroughly: Begin by cleaning the damaged section of the roof to guarantee proper adhesion of the sealant.
– Apply Sealant Evenly: Use a high-quality sealant and spread it evenly over the damaged area, making sure to cover all cracks or gaps.
– Repair Any Damaged Sections: Utilize appropriate repair materials to fix any sections that are beyond just sealing, guaranteeing a seamless and durable finish.
Maintaining and Preventing Future Damage
To guarantee the longevity and integrity of your RV roof, maintaining and preventing future damage is crucial. Regular inspections are key to identifying potential issues before they escalate. Check for cracks, tears, or signs of wear in the roof membrane, seams, and around fixtures. Clean the roof surface at least twice a year to remove dirt, debris, and potential contaminants that could lead to damage. Ensure all sealants are in good condition and reapply them as needed to prevent water infiltration. Trim overhanging tree branches to avoid scratches or punctures on the roof or slide tops. Finally, store your RV under cover or invest in a quality RV cover to shield it from harsh weather conditions and UV exposure, further safeguarding against potential damage.
Related Topics:
- How to Repair RV Roof Membrane: Easy DIY Solutions
- How to Repair RV Roof Leak: Quick and Easy Solutions

