

North Texas hail and extreme heat will soon find every weak point on your RV roof. Waiting for a visible leak means the damage has likely already started inside your walls. A regular check is the only way to protect your rig from the next storm.
Schedule a professional RV roof inspection before the next North Texas storm.
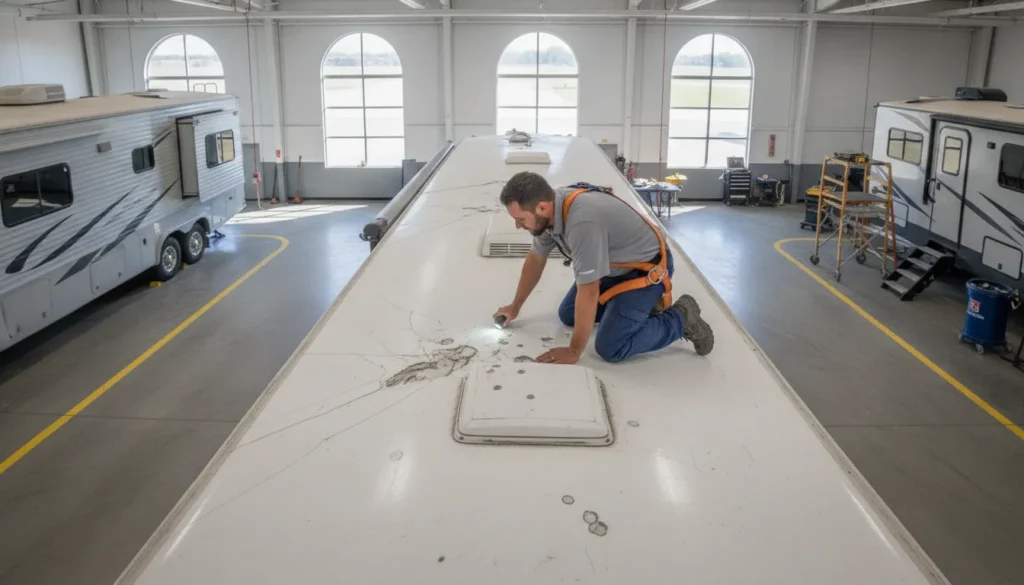
A thorough RV roof inspection checklist includes a full review of seals, vents, and parts to find signs of wear or storm damage. Start by cleaning the roof surface to make it easier to spot small cracks or thin spots in the sealant. Key check points include looking for soft spots, bubbling, or gaps around vents and skylights. You must also check the corners for gaps that let water seep into the walls. Experts recommend you perform a thorough inspection at least twice a year to find issues early and avoid big repair bills. This proactive habit is your best defense against the heavy rain and hail common in North Texas.
Keeping your rig dry requires a sharp eye and a consistent routine. You need to know exactly what to look for before the next heavy clouds roll in. Our guide helps you find early signs of wear to avoid leaks. The process begins with the RV roof inspection checklist for storm season.
RV roof inspection checklist for storm season
Storm season in North Texas brings heavy rain and hail that can damage your rig. A thorough professional RV roof inspection is your first line of defense. High winds put pressure on your roof, which can cause structural parts to bend or fail. It is vital to find these issues before the next big storm hits. Checking your roof twice a year helps you spot small problems before they turn into costly leaks.
Prepare for your inspection
Start by giving your roof a deep clean. Removing dirt and grime makes it much easier to find tiny cracks or signs of wear. Use a soft brush and a mild cleaner that is safe for your roof type. Once the roof is clean and dry, you can clearly see the state of your seals and membrane. This step ensures you do not miss hidden damage that could lead to water getting into your walls.
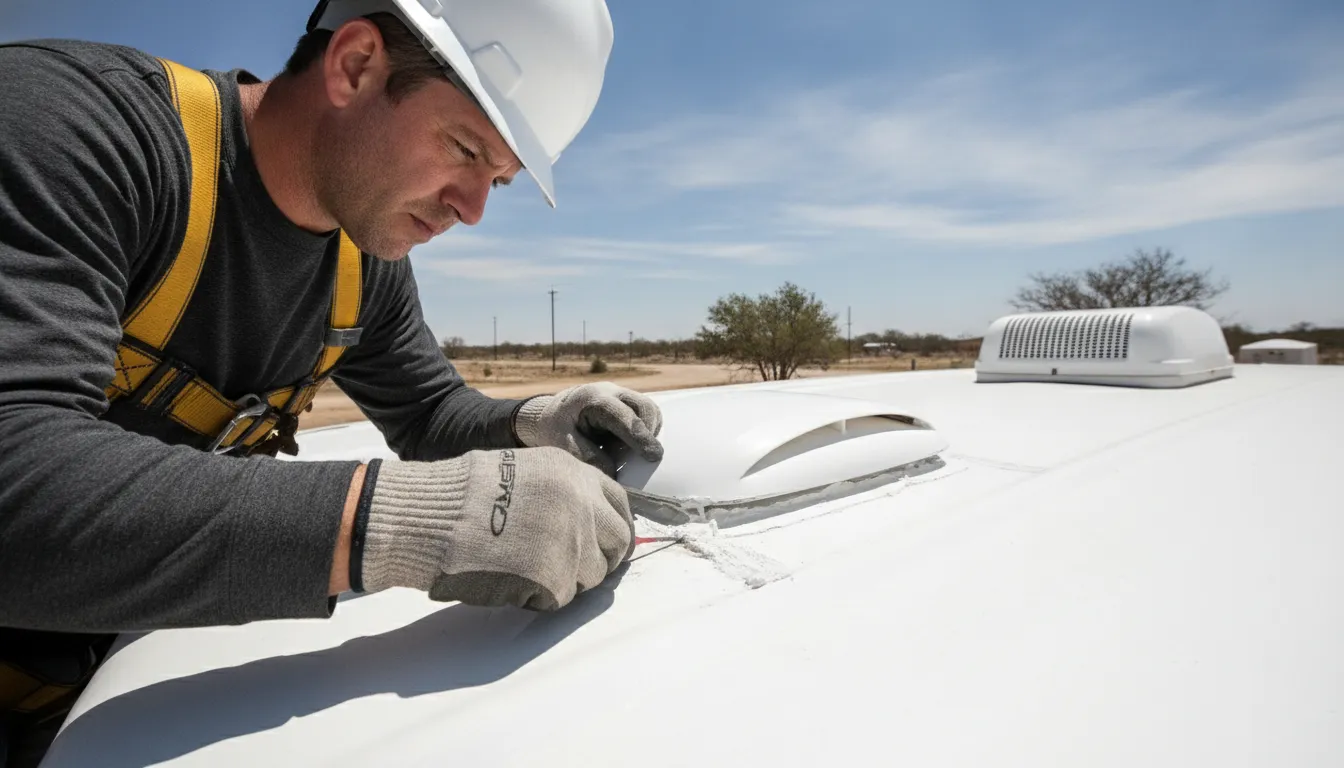
Check seals and penetrations
Most leaks start at the edges or around items that stick through the roof. Look closely at the lap sealant around your AC units, vents, and sky lights. Dried out or cracked sealant is a major red flag. You should also check for gaps in the corners where the roof meets the side walls. Environmental factors like wind pressure can cause these areas to pull apart over time. Finding these gaps early keeps water out of your RV frame.
Steps for a safe roof check
- Check your ladder: Use a sturdy, safe ladder to get a clear view of the top of your RV.
- Search for soft spots: Walk carefully and feel for any areas that sink or feel spongy under your feet.
- Look for bubbles: Check the membrane for any air pockets or places where the material has lifted.
- Inspect for holes: Search for small tears or punctures caused by low branches or hail from past storms.
- Test the sealant: Use your finger to see if the sealant is still flexible or if it has turned brittle.
- Examine roof gear: Make sure covers for fans and AC units are tight and have no cracks.
Identify common damage signs
Keep a sharp eye out for water stains inside your RV, as these often point to a roof leak. On the roof itself, look for loose screw heads or any metal parts that show rust. The safety of your roof depends on these parts staying tight during high winds. If you find deep tears or major soft spots, you may need a more durable fix. Many owners choose an AeroArmor roof protection system to stop recurring leaks for good.
Contact your Mission Critical RV Service Center at (940) 488-5047 to schedule an expert check today.
How often should you inspect an RV roof?
Inspect an RV roof at least twice a year, after severe weather, and more often when the coach travels frequently or stays exposed to the North Texas sun. You should check your rig at least twice a year. This is the basic rule for most RV owners. A spring and fall check keeps you ahead of leaks. But where you live and how you use your rig can change this timeline. In North Texas, for example, the sun and storms are harsh. You may need to look more often to keep your roof in good shape. If you wait until you see a stain on the ceiling, the damage is already done.
Standard twice-a-year checks
Checking twice a year is your best defense. Most experts suggest a professional RV roof inspection every six months. You should do one in the spring before you hit the road for the season. This helps you find any damage from winter ice or snow. You should also do one in the fall before you store the rig for the colder months. This ensures that tiny cracks do not turn into big leaks during the rainy winter.
Your expert RV service center in Denton can help spot thin sealant or loose seams. Small cracks in the lap sealant are easy to miss but can let in a lot of water. If you wait too long, water can rot your walls and your frame. A quick look twice a year saves you money and time. It keeps your mission critical service center from having to do major rebuilds later. This simple habit keeps your rig ready for your next trip.
Check after major North Texas storms
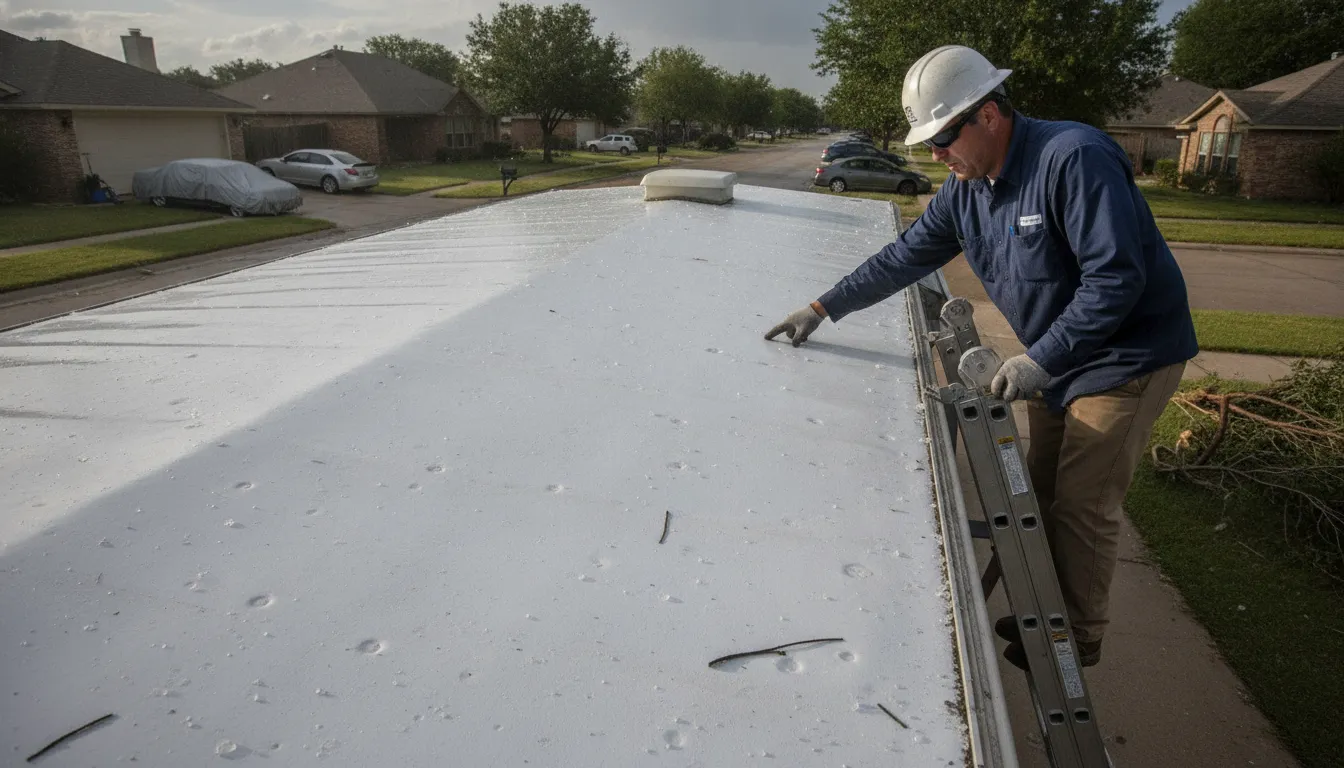
North Texas weather is tough on roofs. High winds and hail can cause quick damage that you might not see from the ground. Strong wind pressure can even cause roof damage or failure if the seals are already weak. After any big storm with hail or high gusts, you should get a ladder and look. Hail can punch holes in plastic vent caps or crack your skylight. You should also check for debris that might have landed on top.
Heat is another big factor in our area. The sun’s UV rays bake your roof all summer long. Over time, extreme heat causes the roof material to dry out and shrink. This is how many common seals start to pull away from the edges. Even tough materials like PVC-P roofing membranes can show wear from high heat and age. If your rig sits in the sun all year, check the seals every three months. This is very true if you do not use a cover.
Adjust for travel and storage
If roof-mounted solar hardware is loose or damaged, ask about RV solar and off-grid upgrades before your next trip.
If you are a full-timer or travel a lot, your needs will change. Road shaking can loosen roof equipment and seals over time. Every time you drive, your rig’s body flexes. This movement puts stress on every joint and seam on the roof. Frequent travelers should add a roof check to their monthly list. You do not want to find a leak when you are hundreds of miles from home. It is much easier to fix a small seam at home than a large leak on the road.
Keep a clear RV roof inspection checklist in your rig to stay on track. This helps you remember to check the AC seals, vent fans, and the edges of the roof. If you hit a low tree branch, you should stop and look right away. Even a small scrape can tear a rubber roof or pull a seam loose. Taking five minutes to look can save you thousands of dollars in water damage. If your rig is in storage, check it once a month to make sure no birds or bugs have moved in.
What to check on every part of the roof
Inspect the membrane, seams, sealant, vents, skylights, air conditioner, edges, gutters, fasteners, and all other roof penetrations. A full RV roof inspection checklist helps you find small leaks before they cause big water damage. You should walk your roof at least twice a year to look for wear and tear. Use a strong ladder and move with care to stay safe while you work. Start by cleaning the roof so you can see every part clearly. This makes it easier to find tiny gaps that dirt might hide from your eyes. Regular checks keep your rig ready for the road and safe from North Texas storms.
Main roof surface and membranes
Check the main roof area for soft spots or air bubbles. These are often signs that water is trapped under the top layer of the roof. Soft spots mean the wood frame under the roof skin may have rot from an old leak.
Most RVs use PVC or rubber roofs that can face material fatigue over time due to sun and wind. If you see deep cuts or thin spots, your roof may need new AeroArmor roof protection to stay dry. Watch for areas that look like white dust as these spots tend to fail first when it rains.
Seams, seals, and roof openings
Leaks often start where two parts of the roof meet or where a vent goes through the top. Check the seams along the front and back edges first. Look for sealer that has pulled away from the roof or has deep cracks. Check the vent covers for holes or cracks. Hail or birds can damage these plastic parts and let water fall right into your rig.
While you inspect rooftop equipment, review the RV AC repair service options if the air conditioner shroud, mounting, or seal is damaged.
Skylights are also a common spot for water to get in if the plastic has become weak and yellow from the sun. You should also check the AC unit to make sure the bolts are still tight. The foam seal under the AC unit can get squashed flat over time and let water seep inside.
If you find deep cracks in the sealer, you may want to book an expert RV roof inspection to find hidden leaks. Do not ignore small gaps in the corners as they can let in a lot of water during a heavy storm.
Edges, gutters, and water flow
The edges of your roof take a lot of stress from wind as you drive down the road. Check the trim pieces to make sure they are not loose or missing any screws. You should also clear out your gutters so water can flow off the roof and away from the side walls.
Check the drip rails above the windows and doors. Water should run off the ends of these rails instead of soaking into the seals. If your gutters are blocked with leaves or dirt, water can back up and pool on the roof.
This can lead to rot in the wood frame and walls of your rig. Look for loose screw heads along the roof line and tighten them to keep the seals firm against the body. Good water flow is your best way to stop mold and mildew inside your living space.
| Sealer State | What You See | Action Needed |
|---|---|---|
| New | Smooth, soft, and stuck tight | No action needed |
| Aged | Small surface cracks or dirt | Clean and watch closely |
| Failed | Large gaps, peeling, or dry rot | Remove and replace now |
Following this RV roof inspection checklist helps you stay on top of roof care every season. Small fixes today save you from a big repair bill and a lot of stress later. Always check every vent, seam, and seal before the peak storm season starts in Denton. Taking these steps ensures your mission critical RV stays in top shape for your next trip.
Warning signs that need prompt attention
Act promptly when an inspection reveals soft spots, bubbling, failed sealant, cracked roof accessories, or interior water stains. These signs can indicate an active leak or hidden damage that worsens during heat, hail, and heavy rain.
A good RV roof inspection checklist helps you find small problems before they grow. Getting an expert RV roof inspection is the best way to find hidden issues. North Texas weather can be harsh on your rig. Heat and storms can cause the roof to fail over time. You should look for signs of wear at least twice a year to keep your rig safe. Finding these marks early saves money and keeps your RV on the road.
Visible outside damage
Start your check on the outside of the roof. Look for bubbles or soft spots in the roof material. Bubbling often means the membrane is pulling away from the wood deck below. This can lead to big leaks if you do not fix it fast. Soft spots are a major concern. They often mean the wood under the roof is rotting from moisture. You should also check for split corners where the roof meets the walls. These gaps are prime spots for water to enter during a drive.
- Gaps or cracks in the lap sealant around vents and fans.
- Bubbles or soft spots on the roof surface.
- Split corners or edges where the roof meets the walls.
- Loose screws or hardware on solar panels and antennas.
- Water stains or dirt trails near the AC unit.
Check the lap sealant around all roof gear. Small cracks can be hard to spot in the bright sun. Use a flashlight to see into tight spots and find tiny gaps in the sealant. Loose screws or hardware can tear the roof surface and let rain inside. Cleaning the roof first makes it much easier to find these small issues. Use a soft brush and mild soap to wash away dirt. This helps you see the true state of the roof seals. Dirt can hide cracks that may fail during the next big storm.
Subtle inside red flags
You must also look inside your RV for signs of water. Water stains on the ceiling or walls are a major warning. These stains mean a leak is already active and damage is starting. If you feel soft spots on the inside walls, the wood inside may be rotting. This hidden damage can hurt the frame of your rig over time. Moisture can also cause a musty smell that does not go away. If your RV smells damp, you likely have a leak somewhere.
Based on a report from the Environmental Protection Agency, checking for roof leaks is a key part of keeping any building safe. A regular walk-through helps you spot cracks before they turn into major holes. If you find wet spots inside, check the roof area right above that spot. Check around the AC unit as it is a common place for leaks to start. Fixing these issues now prevents high repair costs later.
Local North Texas risks
North Texas RV owners face unique risks from the weather. Extreme heat can dry out roof seals and cause them to crack. Heavy hail and wind can also dent or tear the roof membrane. Inspect your roof right after any big storm or hail event. Wind pressure can cause roof parts to shift or bend, which leads to leaks. High winds are known to cause structural bending in various types of roofing. Watching for these signs helps you stay ahead of the weather. Our expert RV service center in Denton can help if you find damage you cannot fix yourself.
When should you call an RV roof professional?
Call a professional when you find soft spots, active leaks, widespread seal failure, hail damage, large tears, or damage you cannot safely assess. You can handle some basic checks during your seasonal RV roof inspection checklist. But some issues need a professional eye to keep your rig safe. Knowing the difference helps you avoid major water damage. Most owners find that a professional RV roof inspection is the best way to catch hidden leaks before they rot your wood frame.
Spotting structural red flags
Call an expert if you feel any soft spots while you walk on the roof. These spots often mean water has already soaked into the wood or insulation below. You should also look for bubbling or big areas where the roof skin looks loose. These signs show that the glue has failed or that steam from a leak is trapped inside. Environmental experts note that roofing membranes can degrade over time due to use and weather, making expert checks vital.
Visible water stains on your ceiling are another clear sign of trouble. By the time you see a stain inside, the leak has usually been active for a long time. An expert RV service center in Denton can use special tools to find the exact entry point. They can also check the integrity of your seals to make sure they meet safety standards. Agencies like the EPA use roof integrity checklists to find leaks and cracks before they cause big problems.
Handling complex repairs
Small cracks in your lap sealant are easy to fix with the right caulk. But if you see large gaps or sections of sealant that are peeling off, you need help. Large repairs often need you to remove the old material and prep the surface correctly. If you do this wrong, the new seal will fail quickly. Professional shops have the right tools to clean and bond these joints so they stay water-tight for years.
You should also seek help if your roof has hail damage or big tears in the membrane. These issues usually need more than a simple patch. A professional can help you decide if you need a spot repair or a full replacement. For long-term peace of mind, many owners choose AeroArmor roof protection. This spray-on system removes the need for yearly caulking and provides a permanent seal against the North Texas sun.
What to do after your RV roof inspection
Photograph your findings, compare them with prior inspections, prioritize repairs, and schedule professional help for damage beyond routine owner maintenance. Once you finish your RV roof inspection checklist, you need a plan to handle what you found. Reviewing your notes and photos helps you track small changes over time. This step is the best way to prevent big leaks in your RV walls or frame. If you found gaps or cracks, take action before your next trip. You should also fix any issues before you store your rig for the season.
Keep records of your findings
Compare your new photos to the ones from your last check. This helps you spot where seals are starting to fail or where new soft spots might be. In North Texas, heat and hail can cause roof parts to break down fast. Keeping a log of these changes lets you fix small issues early. This saves you from high repair costs later. You can also use these notes to show proof of care if you sell your RV.
Plan your roof repairs
If your check found dry or cracked sealant, you must plan a fix. Small gaps around vents can let in enough water to rot your wood frame. You should look into professional RV roof inspection help if you find damage you cannot fix. A pro can tell if you need a simple patch or a full new roof. For long-term peace of mind, many owners choose a lifetime roof to stop leaks for good.
Care for your roof material
A professional RV washing and detailing service can help remove grime before a thorough inspection.
Cleaning is a key part of your post-check work. Removing dirt and waste helps your roof last longer. It also makes the next check much easier. Many roofing coatings need this care to stop the sun and rain from wearing them down. Check that your roof parts meet high quality standards to handle the local weather. After you clean, make sure the roof is dry before you put a cover on your RV.
Frequently Asked Questions
How often should I inspect my RV roof?
You should do a full check on your RV roof at least twice every year. Regular checks help you find small problems before they turn into large leaks. This is very vital in North Texas where the sun and hail can cause harm fast. Experts at Patriots RV Services say that finding issues early is the best way to save your rig from water damage.
Should I clean my RV roof before an inspection?
Yes, you should always wash your RV roof before you start your check. Dirt and grit can hide tiny cracks or small holes in the top layer. A clean roof makes it much easier to see the true state of your seals and roof cover. Taking this extra step helps you find issues that you might miss on a dirty roof. This simple task ensures your rig stays safe and dry during the next storm.
What are the common signs of RV roof damage?
Look for soft spots, bubbling, or cracked seals around your roof vents and seams. You should also watch for water stains on the inside of your RV walls. These signs mean that water has already found a way through your top layer. Finding these issues early helps you avoid big repair bills for wood rot and mold. According to expert repair guides, these warning signs need fast work to protect your rig.
How do I check RV roof seals for leaks?
Walk around the roof and look close at the seals around each item that pokes through the surface. This includes vents, pipes, and the air unit. Look for any parts that are drying out, cracking, or pulling away from the roof. If you see gaps or loose screw heads, your seals are failing and need help. Small gaps in these areas are the most common source of leaks for North Texas owners.
Ready to schedule an RV roof inspection?
Ignoring tiny cracks in your roof seals can lead to hidden water leaks and high repair bills if you wait too long. These small gaps often grow much larger after a heavy storm or a long week in the hot North Texas sun. When you act now, you can stop these leaks before they damage the walls or frame of your rig. A quick check today helps you stay on the road and out of the shop so you can travel with peace of mind. Our team will look at every seam and vent to make sure your rig is ready for the next big storm. Do not let a small leak ruin your next trip or lower the value of your coach.
Ready to schedule an RV roof inspection? Call (940) 488-5047 to schedule an RV roof inspection.