

Water pooling on your RV floor after a rainstorm often points to a failing slide out seal. These rubber barriers degrade over time from UV exposure. Catching a leak early prevents hidden rot that ruins your coach.
RV slide out seal replacement is a critical repair task when rubber parts become brittle or lose their power to keep water and road grime out and away. According to government safety standards, the right service methods are vital if you find damp spots on your carpet or near your slide walls in North Texas. While routine care helps a healthy seal stay soft, a torn seal cannot be fixed with spray and requires you to choose between cleaning or installing new parts. Installing the right parts correctly ensures your RV stays dry, prevents structural rot, improves insulation, and maintains its resale value for years to come to protect your investment.
You may wonder if you can scrub away the grime or if you need to start fresh. Knowing the right path depends on the wear you find on your rubber. Understanding that RV slide out seal replacement starts with the right diagnosis is the first step. The path begins with
RV slide out seal replacement starts with the right diagnosis
RV slide out seals are the first line of defense for your rig. They keep rain, wind, and bugs from getting inside. When they work well, you stay dry and warm. But these rubber parts wear out over time from sun and use.
If you wait too long to check them, you might face costly rot. A quick RV slide out troubleshooting check can find small issues before they grow.
Know your rubber seals
Most RVs use two main types of seals to stay dry. Wiper seals look like flat flaps that wipe the slide walls as they move in and out. Bulb seals are round and hollow. They squish shut when the slide is fully closed or open.
Both need to be soft and bendy to create a tight bond. A tight seal also helps keep your RV inside at a steady heat. This keeps you comfy and saves on fuel.
These seals often work together to provide two layers of safety. The wiper seal clears off dirt and water first. Then the bulb seal creates the final air-tight lock against the RV body. If either part fails, you lose that double layer of safety.
You must know which part is failing to plan your RV slide out seal replacement. Using the wrong seal type can lead to poor fit and new leaks.
Check for wear and tear
You should look at your rubber seals every few months. Look for cracks, rips, or dry spots in the rubber. This wear often happens because of hot sun and cold winters. If the rubber feels hard or brittle, it can no longer squish well.
Also, check if the seals are still stuck to the RV frame. Loose or falling seals will let rain seep into your walls and floor. Look for signs of squish too. A good bulb seal should bounce back after you open the slide.
If it stays flat like a pancake, it can no longer block the wind. This loss of shape means the rubber has lost its spring. Steady checks keep your RV in top shape.
Find hidden gaps and leaks
Gaps are a clear sign you need a new seal. Stand inside your RV on a sunny day and look at the slide edges. If you see light coming through, water and bugs can get in too. You can also spray a hose on the outside to see if it drips inside.
Fast action on an RV water leak repair can save you from mold and wood rot. These hidden leaks are often the most harmful because they stay out of sight for months.
Check the corners of the slide out very closely. These spots are where seals often pull apart or fail to meet. You may see water stains or soft spots on the inside trim.
If the wood feels soft or looks dark, a leak has been there for a while. A clear check tells you exactly where the water is getting in so you can fix it for good.
Clean, condition, reseat, or replace the seal?
Every RV owner must know the state of their slide seals. These rubber parts keep water out of your walls and floors. If they fail, you might face a big RV water leak repair bill. You should check them often to see if they just need care or if it is time for a full RV slide out seal replacement.
Regular care for your seals
If your seals look good but feel dry, you may only need to clean and coat them. Dust and sap can build up on the rubber over time. This grit makes the seal stick to the slide box. When the slide moves, the stuck rubber can pull or tear. You should wipe the seals with a damp cloth first. Then, apply a high-quality UV coat. Proper care keeps the rubber soft and helps it stay that way for years. It also helps the slide out work well as it opens and closes.
Fixing a loose seal
Sometimes a seal is not broken but has just moved out of place. This often happens on the top or sides of the slide. You might see a gap where the rubber should meet the wall. If you catch this early, you can often push the seal back into its track. This is called reseating. You must make sure the seal is tight and flat against the frame. A loose seal allows air and water to sneak into your coach. The NHTSA says checking your seals often keeps the RV safe. If the seal keeps falling out, the track may be bent or worn.
Signs you need a new seal
Seal sprays can do a lot, but they cannot fix a hole. If you see cracks that go all the way through the rubber, it is time to stop. You cannot glue a torn seal back together and expect it to hold back rain. Deformed rubber that has lost its shape is also a bad sign. If the seal stays flat when the slide is open, it will not press tight against the wall. At this point, you need a new seal to protect your rig. Delaying this fix leads to rot and mold in your RV frame. Get expert help for an RV slide out troubleshooting plan if you find leaks.
| Seal State | Best Action | Final Outcome | Work Level |
|---|---|---|---|
| Dusty or dry | Clean and coat | Soft, bendy rubber | Low |
| Out of track | Reseat the seal | No more gaps | Medium |
| Cracked or torn | Replace the seal | Dry, safe walls | High |
| Lost its shape | Replace the seal | Tight water seal | High |
For expert slide out care in Denton, TX, call Patriots RV Services at (940) 290-7800.
How is an RV slide out seal replaced?
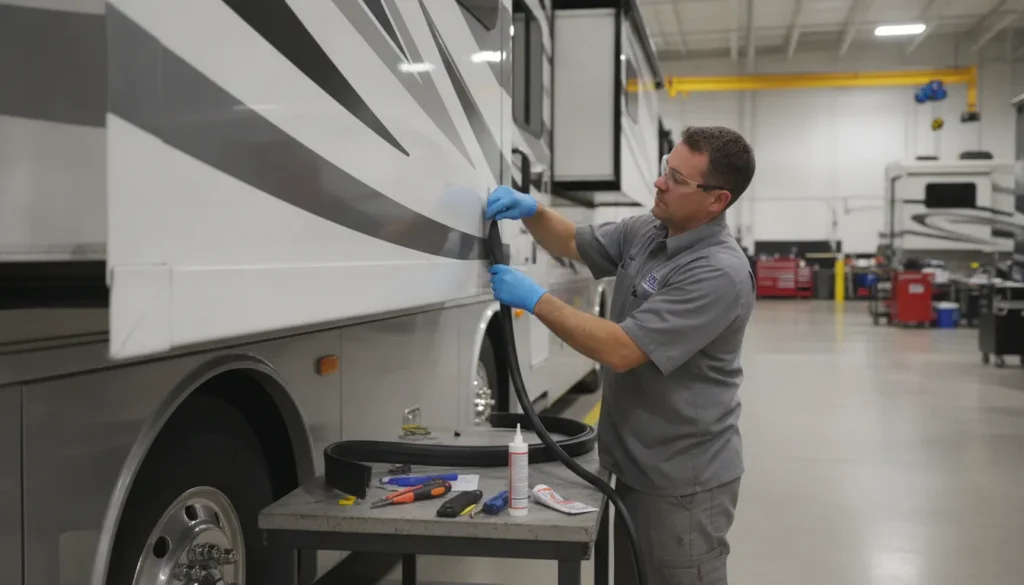
Changing a slide out seal is a task that needs focus and the right tools. If you live in Denton or North Texas, you know how the sun and rain can wear down rubber parts. A bad seal lets water into your walls, which leads to rot and mold. Most people start looking into RV slide out seal replacement once they see light through gaps or find wet spots on the floor. It is a big job, but doing it well saves your RV from RV water leak repair costs later.
Find the right seal shape
The first step is to know what kind of seal you have. There are many shapes like D-seals, bulb seals, and wiper seals. Some slide outs use a single piece, while others have two parts that work as one. You must look at the end of the seal to see its shape or profile. If you buy the wrong one, it will not fit the track or stop water from getting inside. Check your owner’s guide for the right part number. You can also take a small piece of the old seal to a shop to match it. Good parts meet strict safety standards to keep your RV dry and safe.
Measure and prep the spot
Next, you need to measure how much seal you will use. Measure each side of the slide out twice to be sure. It is better to have a bit too much than to come up short. Before you start, park on flat ground. Turn off the power to the slide so it does not move while you work. Clean the track where the new seal will go. Old glue and dirt will stop the new seal from sticking. Use a mild soap that does not hurt rubber. Avoid harsh cleaners that make new rubber turn brittle fast. This prep work helps the bond last for a long time.
- Move the slide out halfway. This gives you room to reach both the inside and outside of the track.
- Pull the old seal out of the track. If it is glued, use a plastic tool to scrape away the old sticky bits.
- Clean the metal track with a cloth. Make sure it is dry and free of any oily film before you move to the next step.
- Apply a thin bead of glue if your seal needs it. Some seals just snap into a track, but others need a strong bond.
- Press the new seal into the track. Start at the top and work your way down to the bottom on each side.
- Cut the ends of the seal at an angle. This helps the corners fit tight so water cannot find a way through the gaps.
- Close the slide out and let the glue sit. Most glues need a full day to cure before you travel or see heavy rain.
Check the fit and movement
Once the glue is dry, test the slide. Move it in and out slowly. Listen for any odd noises like rubbing or popping. The new seal should fold or flip as the slide moves. If it sticks or bunches up, you may need to add a bit of seal spray. This spray keeps the rubber soft and helps it glide. Watch the corners to see if they stay tight. A good fit keeps your RV warm in winter and cool in summer. It also stops bugs from finding a way into your home. Proper care now means you will not have to do this again for many years.
When to seek professional help
Sometimes the job is too big for one person. If your slide out is not straight, a new seal will not fix the leak. You might need a pro to check the motors or the frame. At Patriots RV Services, we handle these complex jobs each day. We can find out if you need a simple fix or a new system. Our team knows how to get your RV back on the road fast. If you are not sure about doing the work yourself, give us a call at (940) 290-7800. We are here to help our neighbors in Denton and beyond stay safe and dry.
Why can a slide-out still leak after seal work?
You might think that an RV slide out troubleshooting plan ends once you replace the rubber. But some owners find water inside even after new seals are in place. In many cases, the seal is not the only part of the system that needs care. If the slide box is out of alignment, the new rubber cannot create a tight fit against the wall. Without proper adjustment, slide-outs can develop gaps that let rain slip through.
Check for slide box alignment
Alignment is a big reason why leaks happen on fresh seals. The box must sit square in the wall opening so that the rubber presses evenly on all sides. If one side is too high or tilted, the seal will have a gap. This lack of proper adjustment can lead to mechanical failure and water leaks. Our team in Denton, TX often finds that a small shift in the slide gears can fix a persistent leak that seals alone could not stop.
You should also look at how the wiper seals flip when the room moves. These seals should turn inside out as the slide goes in or out. If they stay stuck in one direction, they act like a tray that holds water. This can lead to a RV water leak repair job that could have been avoided with a simple check. Keeping the rubber clean and soft helps it flip as it should.
Look at corners and roof edges
Corners are the most common spots for leaks to hide. Water often tracks along the top edge of the slide and drops into the corners. If the seal does not meet perfectly at these joints, water will find a way in. In North Texas, heavy rain can push past a seal that is not fully seated in its track. You must ensure the rubber is seated properly and not tucked or folded at the ends. Proper seal tension is needed to ensure the rubber correctly wipes debris away when the slide moves.
Debris on top of the slide is another hidden cause. Leaves or sticks can get trapped under the seal and lift it up. This gap allows water to run down the side of the box and into your floor. This is why we suggest adding a TrueTopper slide topper to keep the roof clear. A clean roof means your new seals can do their job without anything getting in the way. At Patriots RV Services, we ensure your mission-critical RV systems stay dry.
For expert help with your RV in Denton or the North Texas area, call Patriots RV Services at (940) 290-7800.
How to prevent slide-out seal leaks
You can stop leaks before they start with a few simple steps. Keep your RV slide in good shape to save time and money. This helps you avoid an RV slide out troubleshooting call during your next trip. Regular care keeps the rubber soft. It also ensures a tight seal against the North Texas heat and heavy rain.
Inspect your seals often
Check your rubber seals at least once a month when the slide is open. Look for signs of wear like cracks, tears, or loose spots. A government safety study shows that proper service methods are key for safe RV slide use. If you see gaps or dry rot, you may need an RV slide out seal replacement. This protects your rig from mold and structural damage.
Ensure the seals wipe away dirt and water when the slide moves. The seal must have the right tension to stay flush against the wall. In Denton, TX, shifts in the ground can even affect how your RV sits. If the slide box is out of line, it can leave gaps that let water in. Watching for these early signs helps you stay ahead of major RV water leak repair needs.
Clean and condition rubber parts
Dirt and sand can act like sandpaper on your rubber seals. Wipe them down with a damp cloth to remove grit and grime after every trip. Use only mild soap and water or cleaners made for RV rubber. Avoid harsh chemicals that can make the material dry out or crack. Using the wrong soap can do more harm than good over time.
After cleaning, apply a high-quality rubber conditioner to all sides of the seal. This helps the rubber stay soft in the harsh sun. Soft seals create a better bond and prevent air leaks that hurt your RV insulation and comfort. This simple task is one of the best ways to extend the life of your slide system.
Use slide toppers for extra protection
Installing a TrueTopper Slide Top is a smart way to shield your seals. These covers keep rain, leaves, and debris off the top of your slide out box. This means less junk gets caught in the seals when you pull the slide in. You will not have to climb on a ladder to sweep the roof as often.
Reducing the amount of water that hits the seals directly also lowers your leak risk. Toppers act as a first line of defense against the sun and storms. They keep the rubber out of direct light which stops it from getting brittle. This simple upgrade can save you from an early RV slide out seal replacement and keep your inside dry for years.
Frequently asked questions about RV slide out seals
How do I know if my RV slide-out seal needs replacement?
Replace a seal when it is torn, cracked, permanently flattened, missing sections, or no longer staying attached. Cleaning or conditioning may help rubber that is dirty or dry, but it cannot restore damaged material or correct a seal that no longer makes contact.
Can RV slide-out seal conditioner stop a leak?
Conditioner can help maintain compatible rubber and reduce sticking, but it is not a leak repair. If the seal is torn, detached, compressed, incorrectly positioned, or paired with an alignment problem, the underlying issue must be corrected.
Why does my slide-out leak only during heavy rain?
Wind-driven rain can reach a small gap that ordinary rainfall does not expose. Inspect the top edge, corners, wiper direction, bulb compression, attachment points, and nearby seams. A controlled water test can help trace the entry point without guessing.
Should I replace every slide-out seal at the same time?
Not necessarily. Each seal should be inspected for its condition, fit, and function. Matching aged sections may warrant replacement together, but a professional inspection can distinguish a localized failure from a broader seal or alignment problem.
Ready to stop your RV slide out leaks for good?
Ignoring worn seals is a risk that leads to costly wood rot and mold growth inside your RV walls. These issues often stay hidden until a small leak turns into a major repair bill that keeps your rig off the road for weeks. By acting now, you can catch minor wear before it causes deep structural damage and ensure your next trip is dry and stress-free. Our expert team in Denton will inspect your seals and provide the professional RV service your rig needs to stay in peak condition for every season. Don’t wait for the next heavy rain to find a problem that you could have prevented today. Taking care of your seals now means more time on the road and less time in the shop later.
Ready to get started? Call (940) 290-7800 to schedule RV slide-out seal service.